
*********************************************************************************************************************************************
NOVEMBER 2026 UPDATE
*********************************************************************************************************************************************
STEVE HARROD
*********************************************************************************************************************************************
MATT OWEN
*********************************************************************************************************************************************
KARL CROWTHER
*********************************************************************************************************************************************
MIKE WHITCHURCH
**********************************
*********************************************************************************************************************************************
ALAN DEWEY
*********************************************************************************************************************************************
HYWEL THOMAS
*********************************************************************************************************************************************
KIER HARDY
*********************************************************************************************************************************************

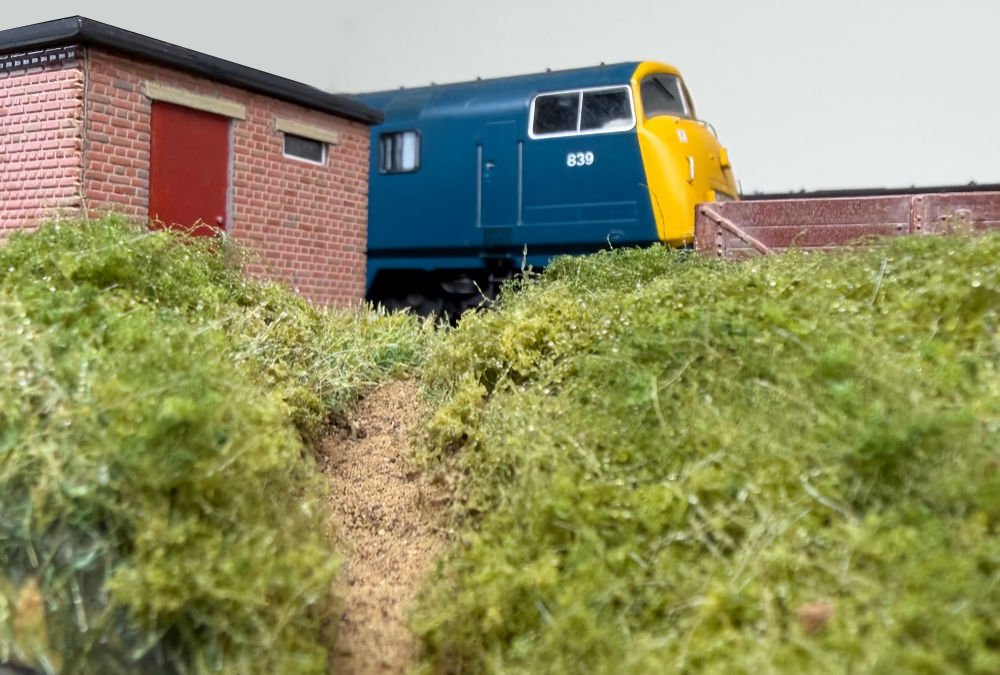 With a glimpse of Warship 839 Relentless resting in Newton Abbot works yard, this view shows progress on the project which has been carried
out during the summer. As can be seen in the final image further down the page, the track & ballast have been detailed and painted accordingly.
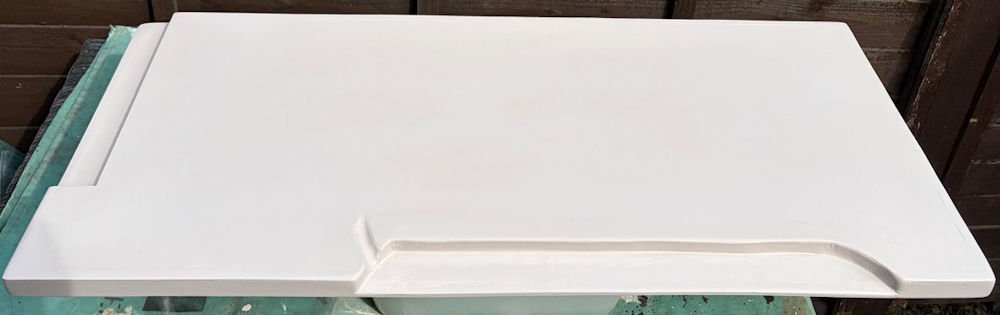 Firstly back in April this year the baseboard for this micro layout was constructed from the usual softwood and ply sheet. Two recesses were cut
out, for both the traverser pit (part of it) and the embankment.
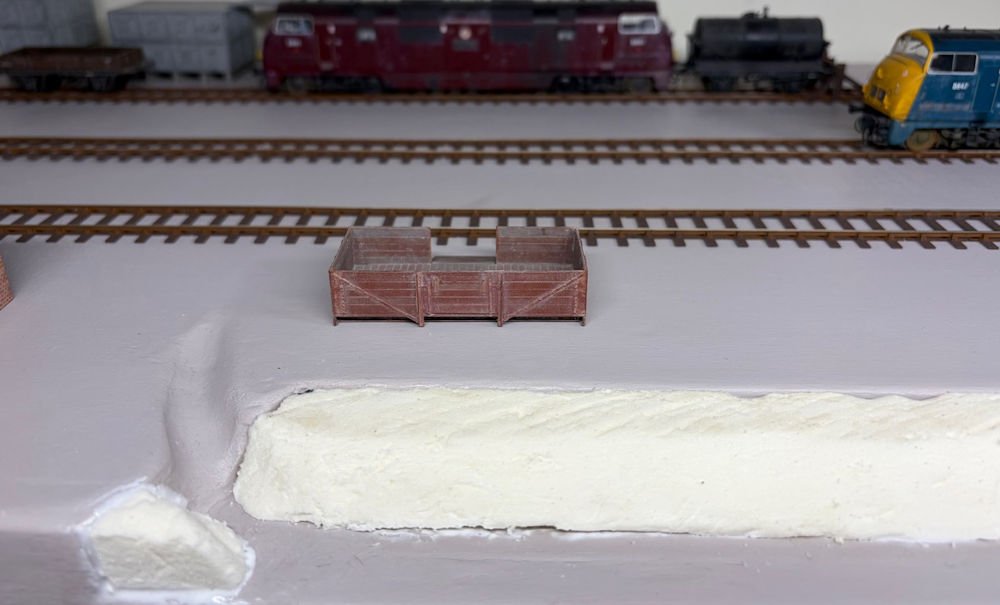 Next up using builders insulation board, the bank was cut to shape and glued in place...
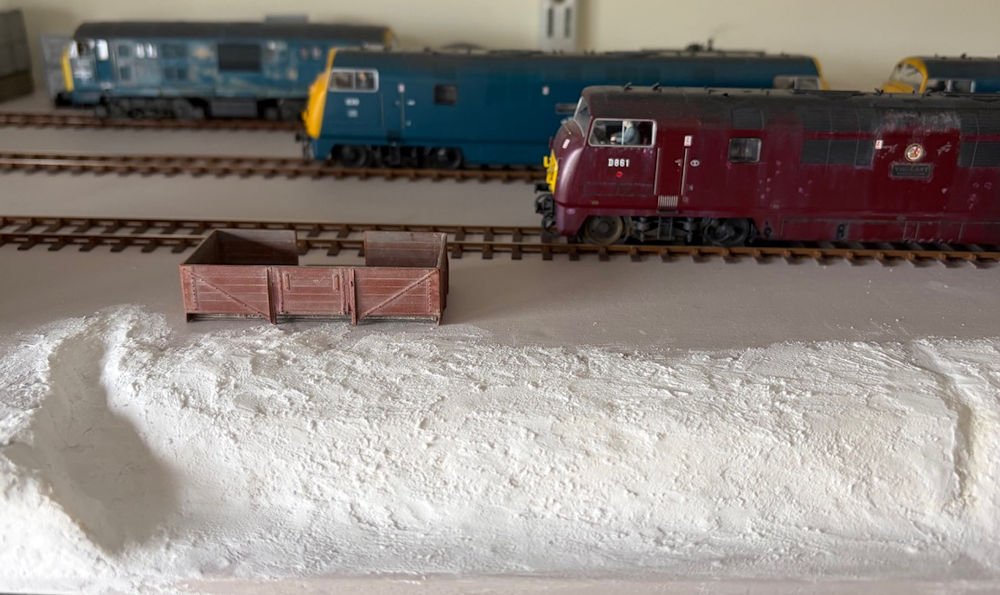 ...Then using filler to create extra contours and finally adding a primer / sealant to it.
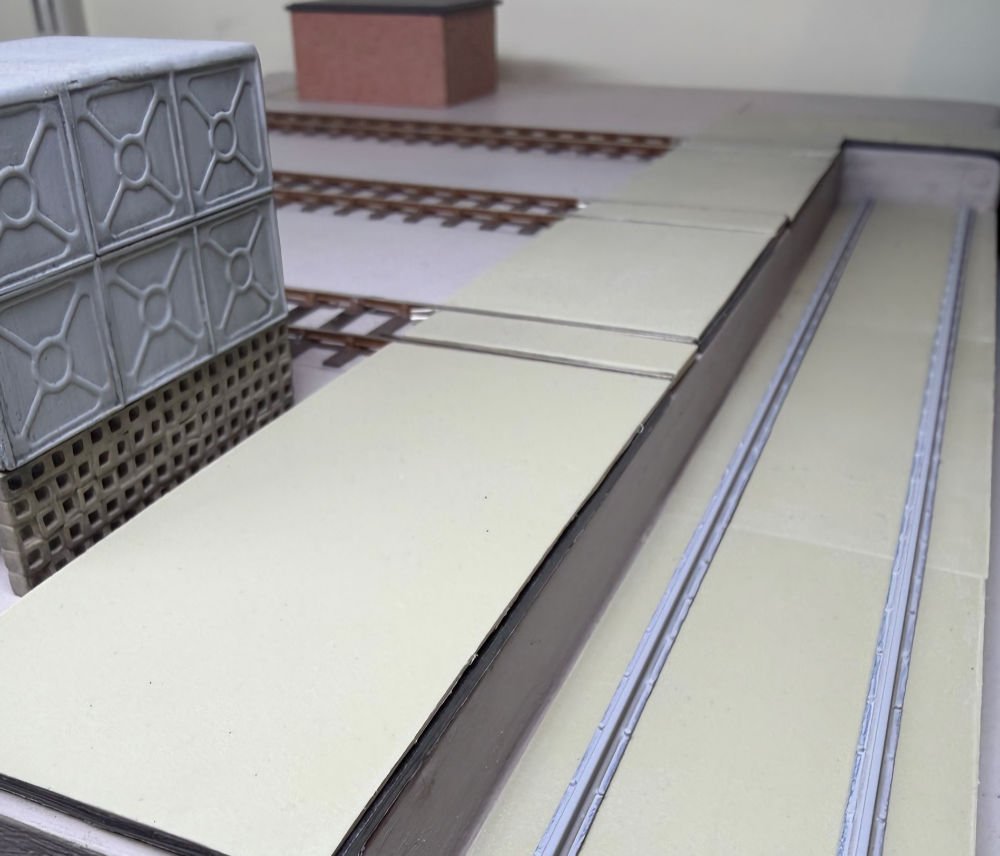 The concrete pad around the traverser was created using the Wills scenics concrete sheets. I also made some rails and chairs for the traverser pit.
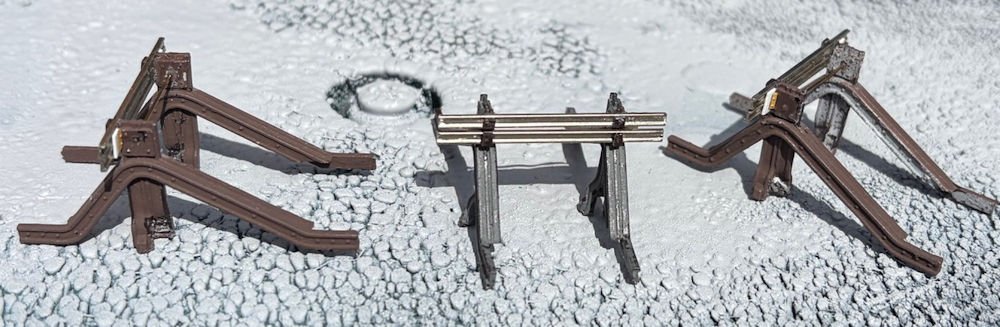 Buffer stops are the old Peco ones, with spare bullhead rail used as the horizontal section enabling them to be regauged to EM (although the new
Peco versions have options for OO or EM).
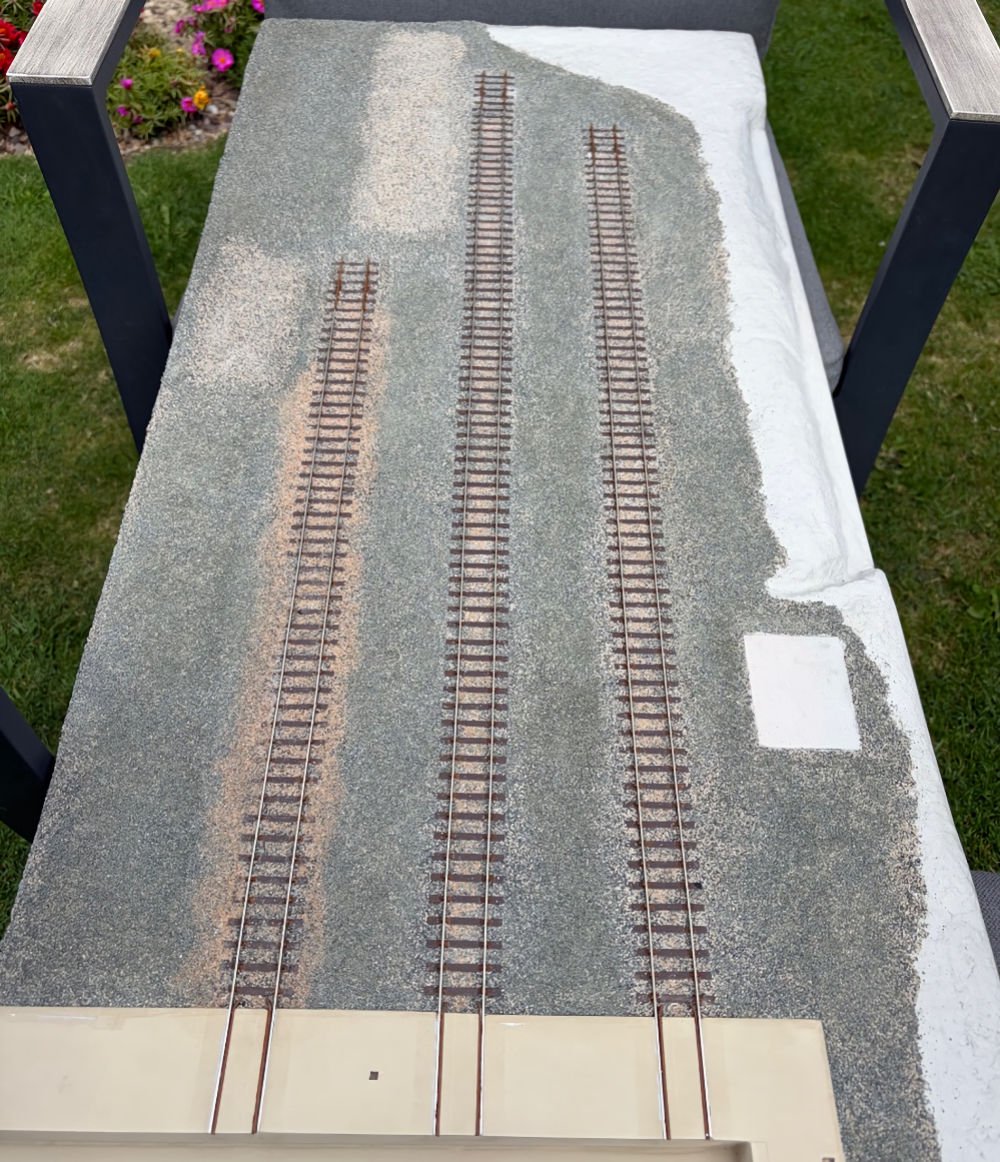 The time consuming job of ballasting was next, but unfortunately for me it was not just the track but the whole of the yard that needed
ballasting, and as we all know it's a fiddly job (a lot easier in 1/32nd I can tell you). Again I used various finescale grades and colours to
get it looking as best I could with the images I have of Newton Abbot Works Yard.
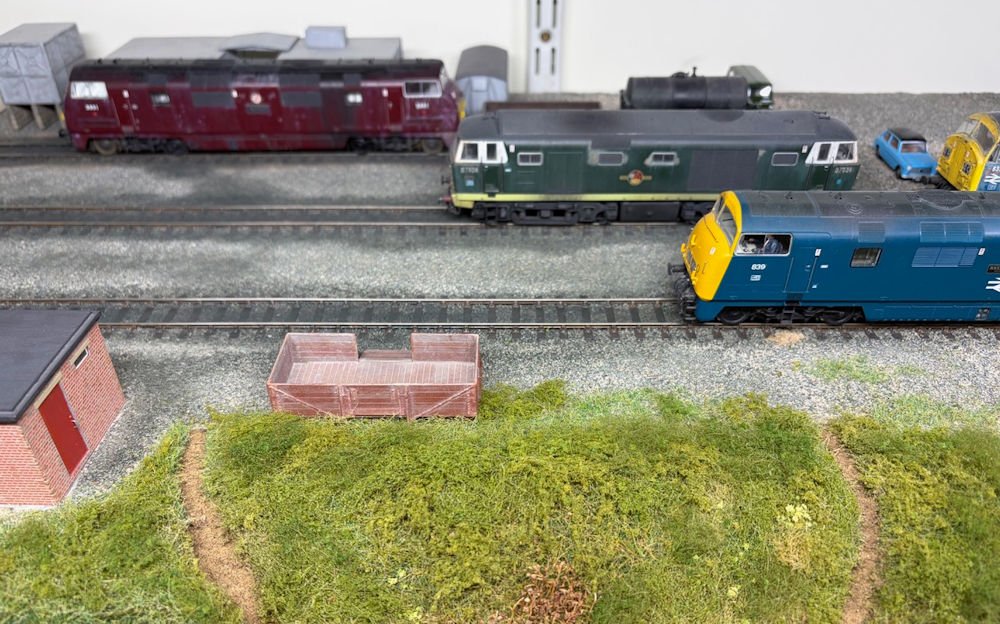 Its been a while since I used a static grass applicator, I even bought a new one from WWScenics and after reading Gordon Gravett’s excellent
‘Modelling Grassland & Landscape Scenics’ book. This along with using other WWScenics flock range finally brought the embankment to life.
In the end Newton Abbot works yard is just a diorama to show off my fleet of 4mm diesel hydraulics, its DCC operated (no sound yet) however after
being kindly gifted from my late friend Bob Hunter his 4mm West Highland models (with sound), the yard may occasionally have to become Fort William!
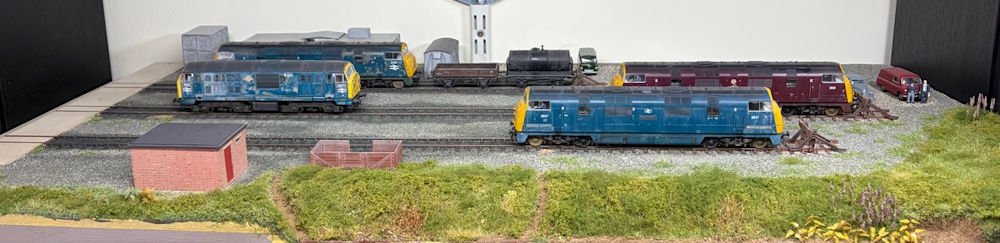 An overall view of the yard which is almost complete. I am currently making the oil pipe that spans the entire length of the board, that was
for fuel oil from the storage tanks (out of view right hand side) that fed the daily servicing shed (out of view left hand side). Im also making
the barrier that separated the car parking area in the yard. The small overhead masts supplying the traverser with its 440v have already been
constructed, as well as the integral lighting frame. In amongst all the brambles I have added in some spring primrose at one end of the board and
at the other end some rosebay willow herb, other wild plants such as ferns, birdsfoot trefoil and lesser celandine are also visible in the yard.

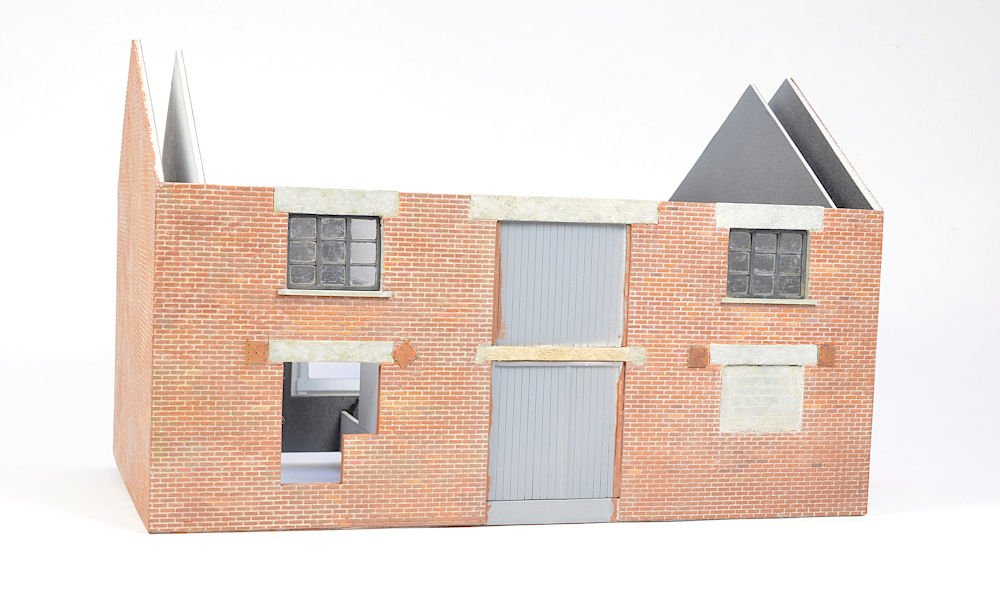 Following on from my last update, work has been continuing on the dock building - mainly by painting bricks. The real structure has a wide
variety of brick colour, with various sections of wall having been rebuilt at various stages of the building's life. In 4mm scale I find that
it's not realistic to try and represent this mix of shades because if you're not careful you end up with something that looks like a patchwork
quilt of colour. As I've said before, I prefer my models to be more muted and subtle in their colouring and weathering.
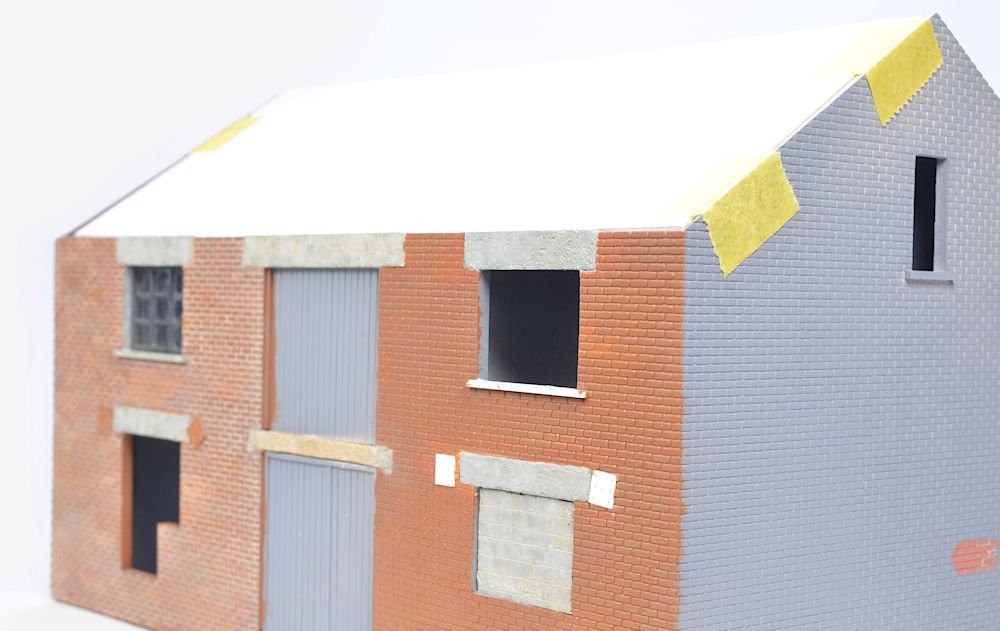 This shows the various stages of painting bricks from finished and weathered, the base brick colour and finally primed in grey.
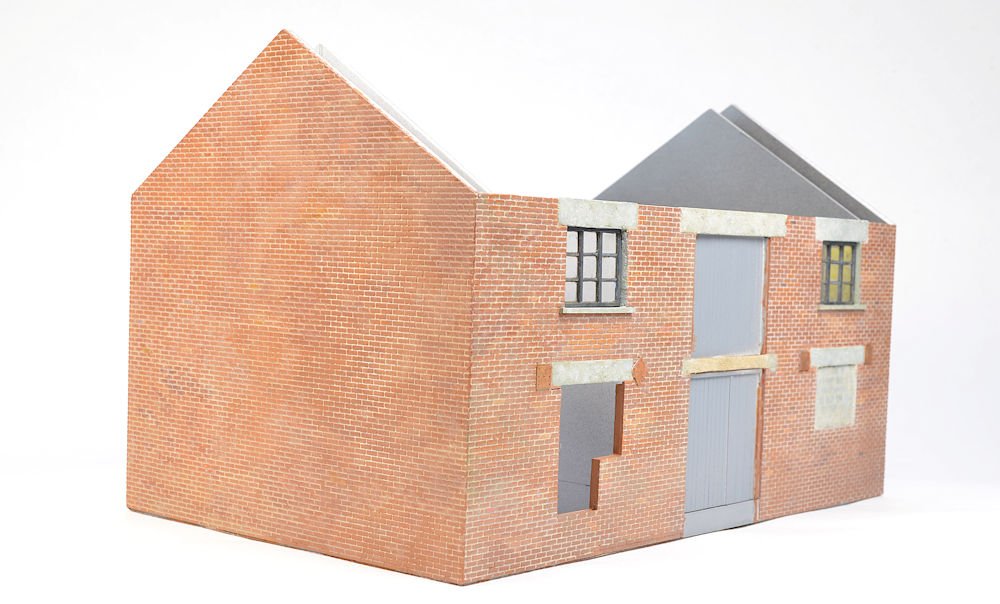 There's still a fair way to go, but it's starting to come to life after a long time and a lot of effort.

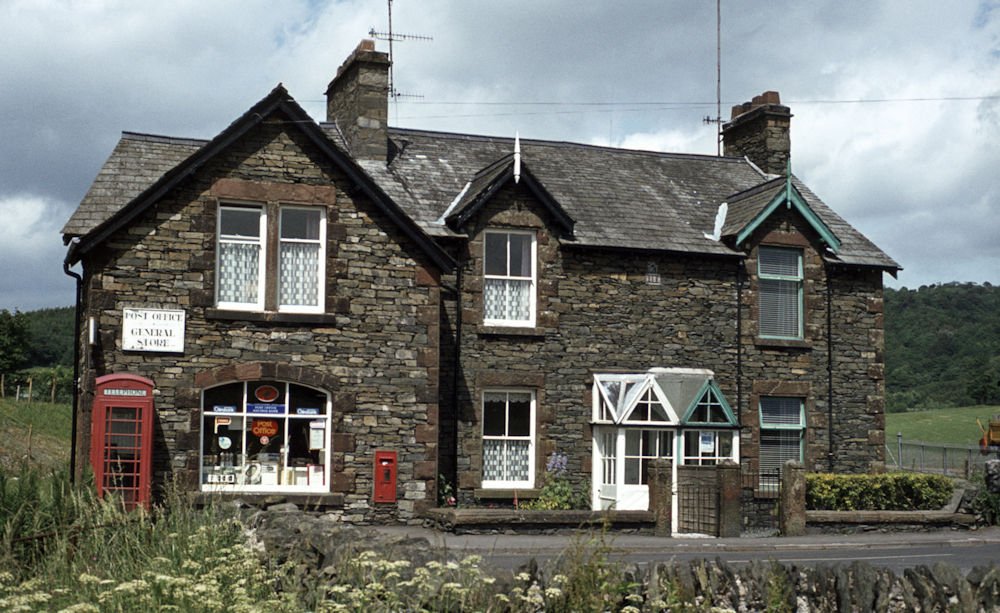 Most recently, attention has turned to detailing the area around Kentside station and
goods yard. This photo I took at Haverthwaite around 1983 of a building that really
appealed to me has waited something like 40 odd years to a start being made on
modelling it. On the layout it will incorporate the Kentside Post Office and is situated
beyond the station car park and roadway. A card mock-up of it has appeared in
previous photos. Luckily it still survives and was located on Google Street view,
looking not that different from when I originally saw it, though no longer a Post Office.
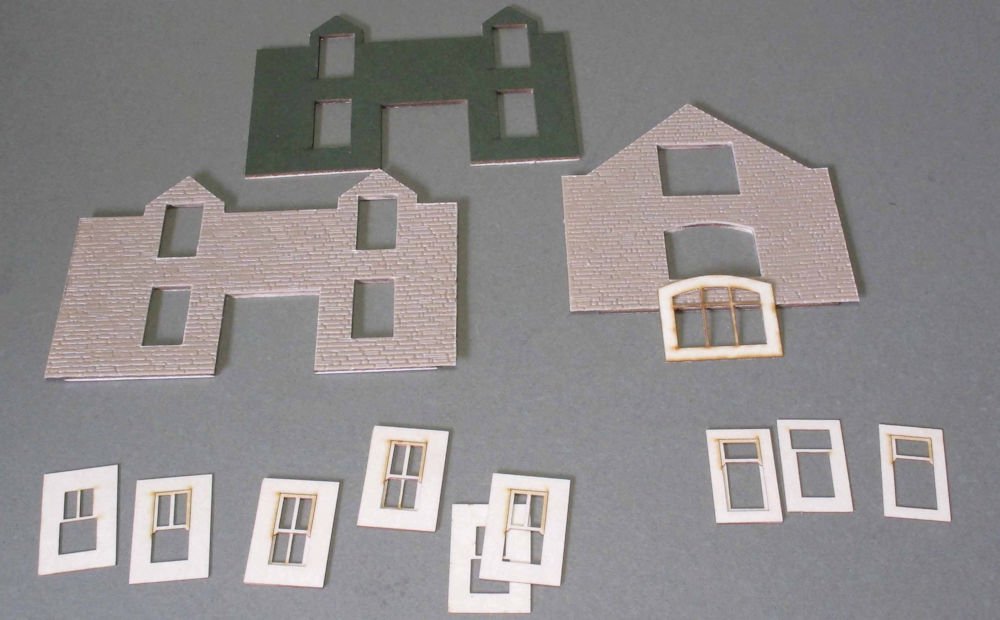 The basic walls were cut on the laser from mounting board, and the windows being
done using 0.3mm Polybak laser board. Here it can be seen how the sash windows
are made up of two separate layers. For the stonework I’ve stayed with Slaters
embossed sheet in this case to represent the local limestone, glued to the card with Evo-Stik.
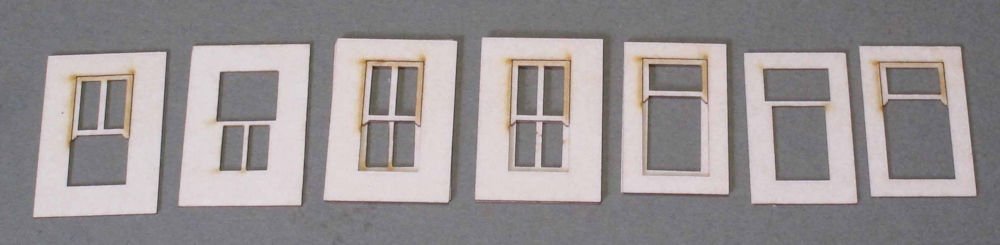 A close-up view of the sash window components. The laser gives a very precise cut.
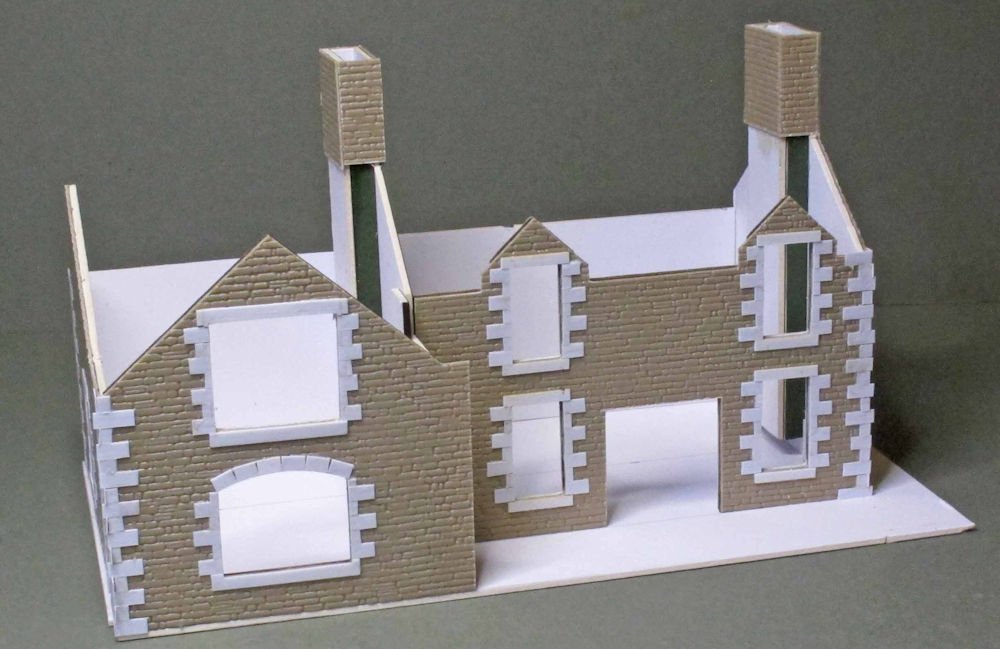 The walls of the basic structure being assembled and 10-thou styrene strip being
used to build up the quoins and lintels etc. The eagle eyed might spot that the
original building has a rather more complex outline than that being modelled, but it
was felt that the slightly simplified outline adopted was complicated enough already.
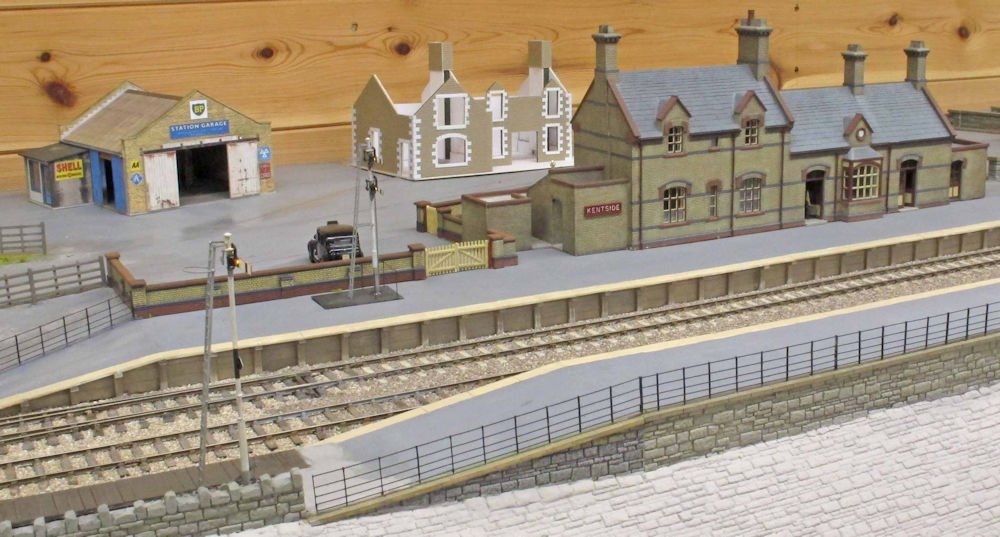 A view of the building roughly where it will reside on the layout.
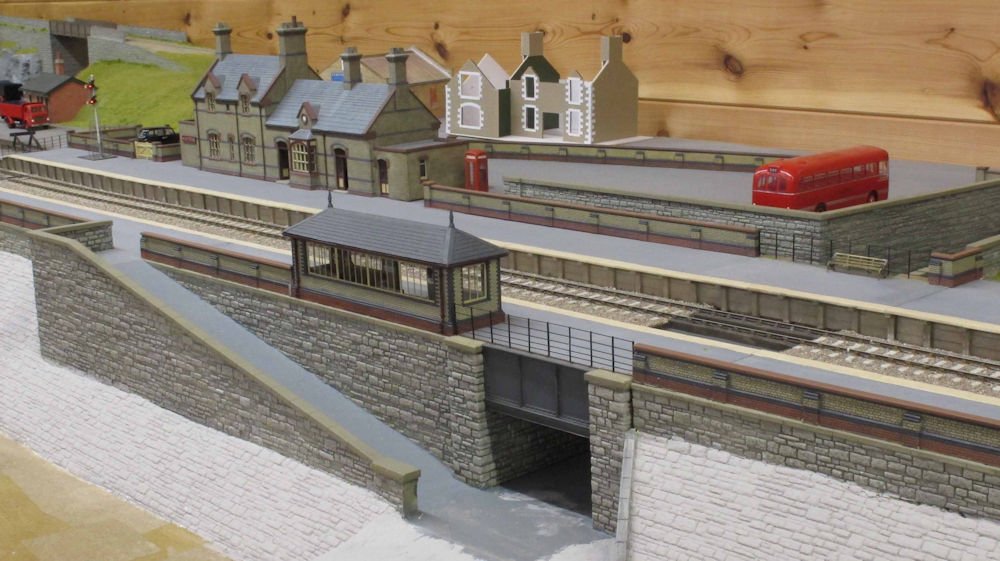 And from the other side it can be seen that the station boundary wall has been built and fitted.
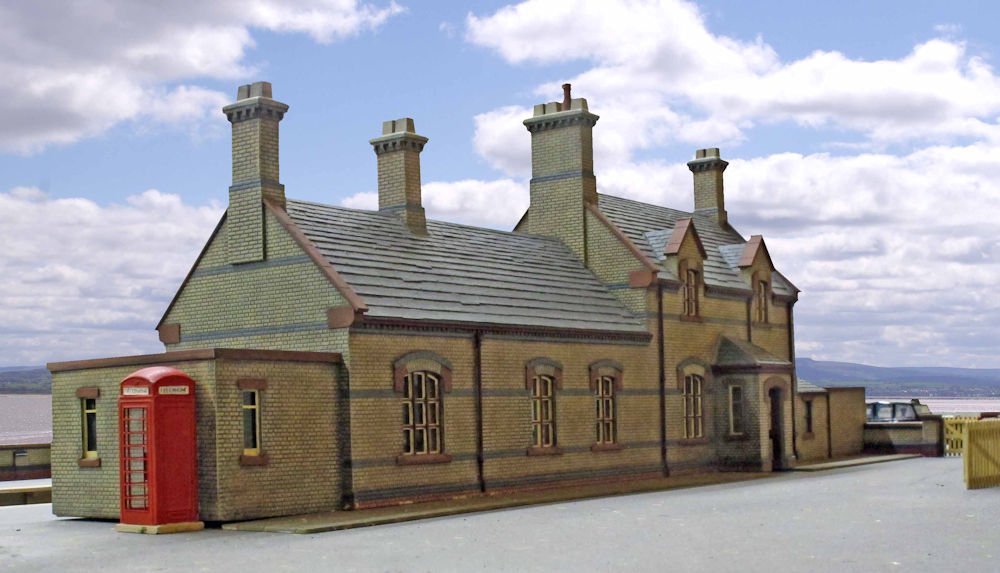 A view of the station entrance from the car park side, with a genuine view of
Morecambe Bay superimposed beyond (all my own work, not AI I might add).
Obviously some bedding in of the station building to be done here.
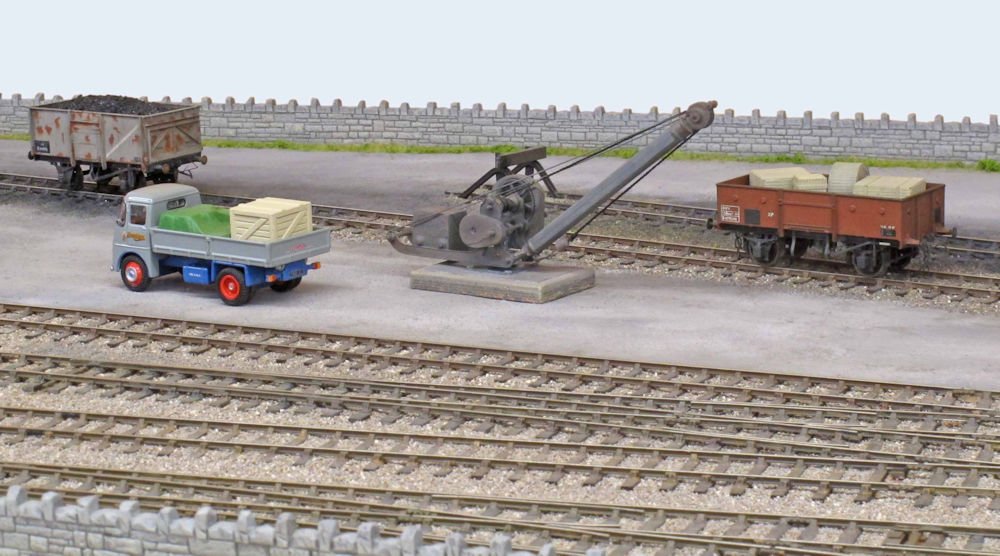 And finally moving on to the goods yard, the ground surface has been created and
the crane which came from the original Kentside exhibition layout temporarily sited in
position. The rough ground surface was made with a range of fine scatter materials –
earth powder, ash, fine sawdust and the like laid onto a bed of PVA. Once dry the
excess was vacuumed off and then sanded to knock back the texture a little.
Painting was then done with a palette of artists acrylics. Overall I’m pleased with the
result though blending the hard ground into the adjacent ballast needs more work. It
may have been better to have done the groundwork first with the ballasting after that.

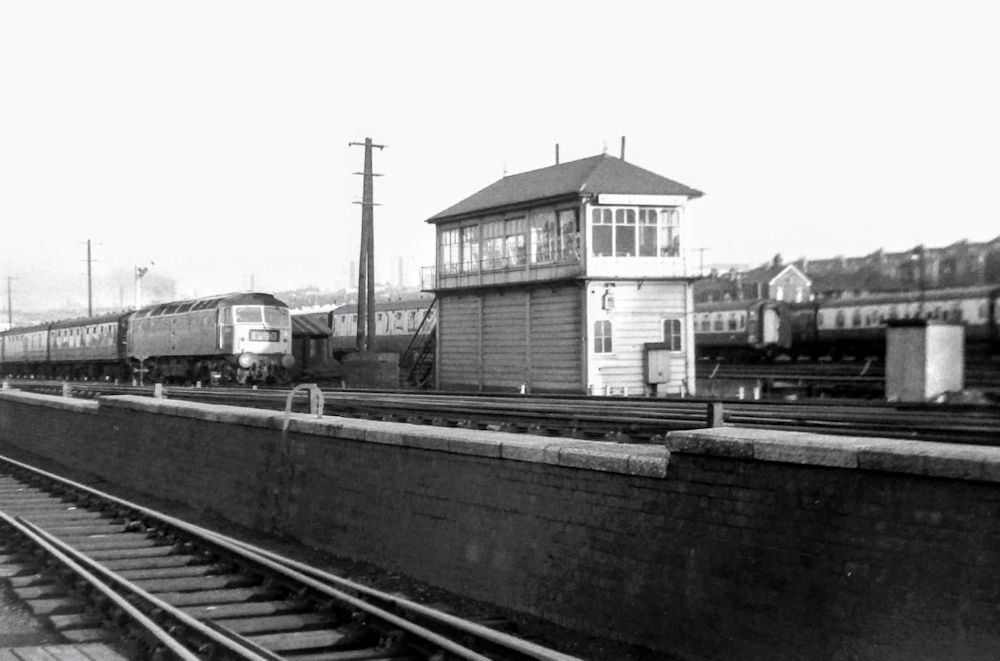 One of my original favourite spotting places was Heeley Carriage Sidings, Sheffield, and living just up the road it was convenient too. When I
first started spotting Heeley station was open and I used to frequent that as well, but regrettably before I had a camera. All these shots are
undated but will be around the winter of 1969/70. Firstly we see D1541 on the 14.27 Leeds to Cardiff.
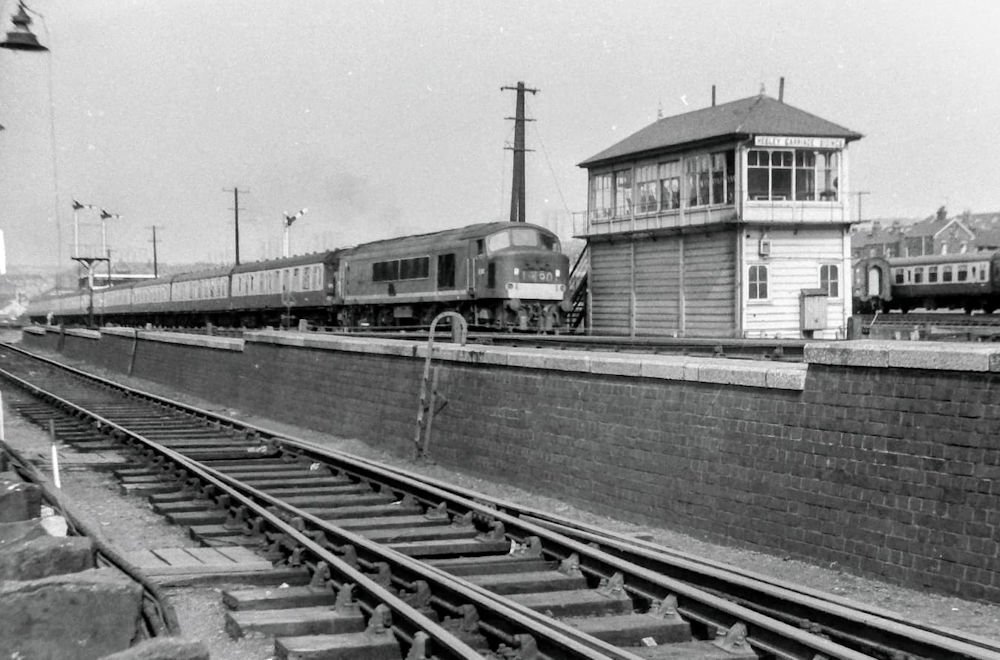 Peak D156 on an afternoon Sheffield Midland to St Pancras working.
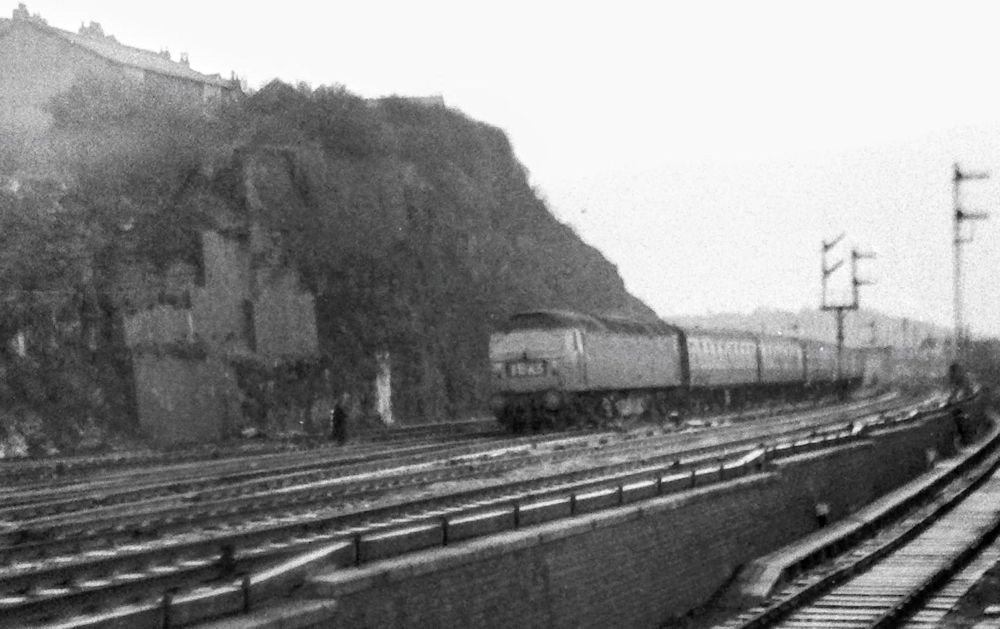 Looking to the south Brush type 4 D1867 brings the 1E63 towards the carriage sidings.
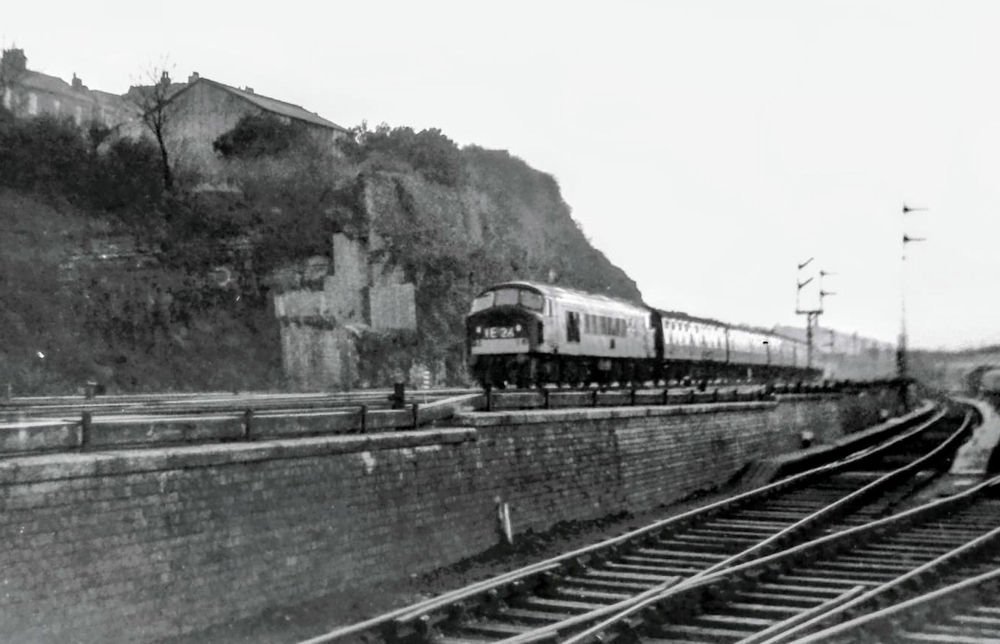 From the same position D163 is seen on the 13.50 St Pancras to Sheffield Midland.
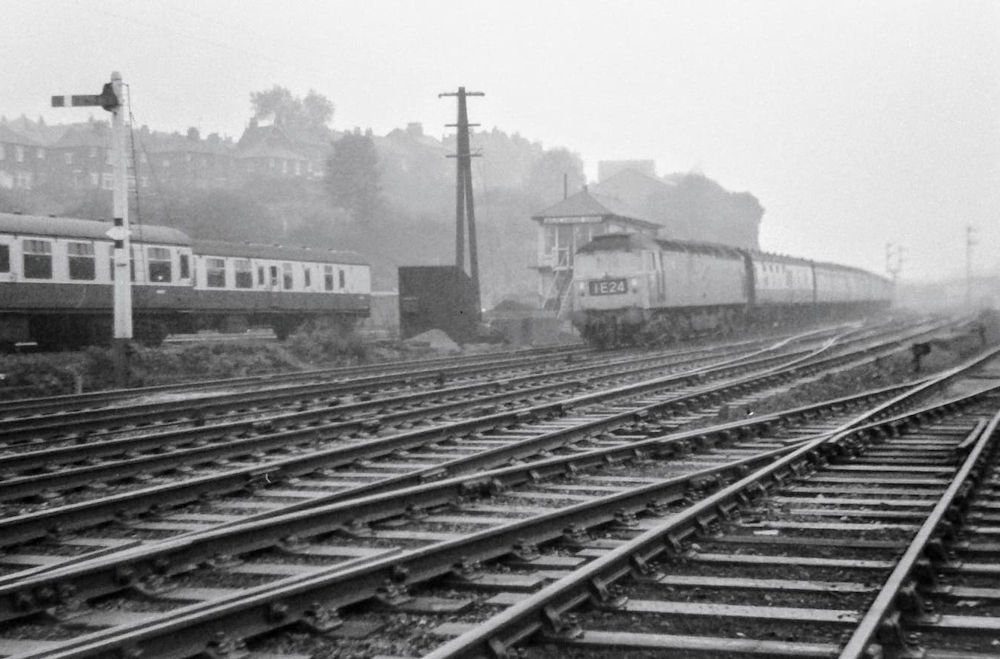 Moving slightly further north to include the signal box, D1618 is seen on the 11.20 Cardiff to Sheffield.
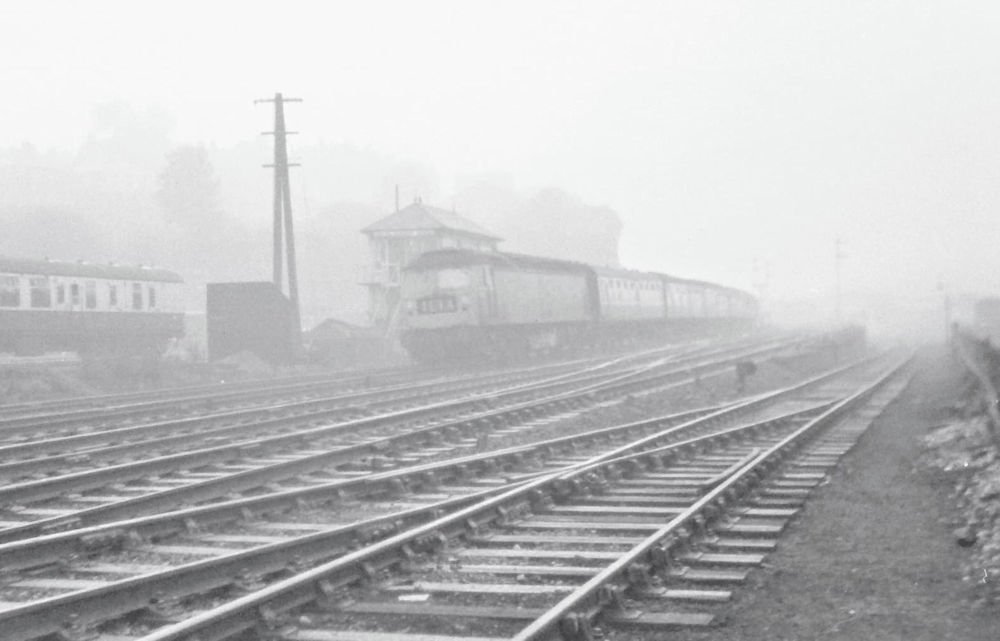 In slightly foggy conditions D1628 brings the 11.50 St Pancras to Sheffield home.
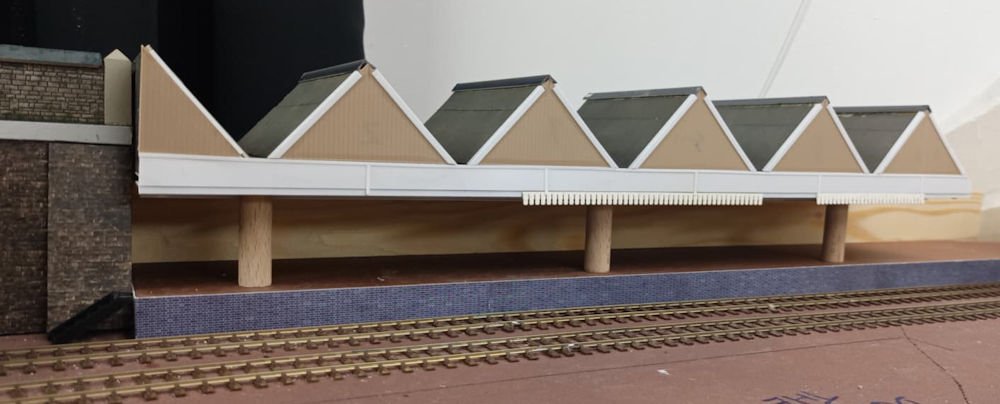 Meanwhile on the layout work continues with the Motorail terminal. The repurposed roof has been clad in planked plastic card, the valancing
by LCUT Creative is very fragile so is currently only fitted temporarily to prevent damage. The dowels are there until I can get some proper columns.
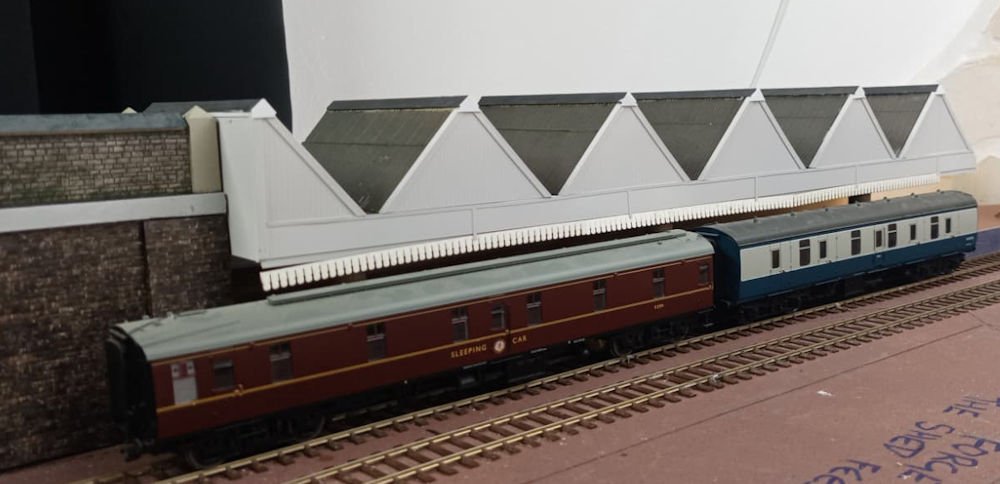 The roof after a lot of masking and a couple of coats of GW Skull white, awaiting weathering in the fullness of time.
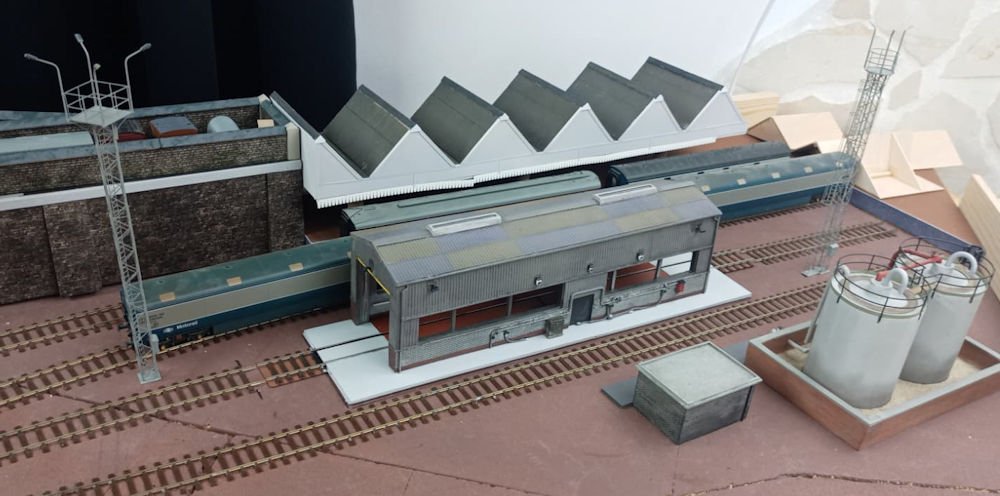 The fuelling shed put back in place and the 2 lighting towers installed.
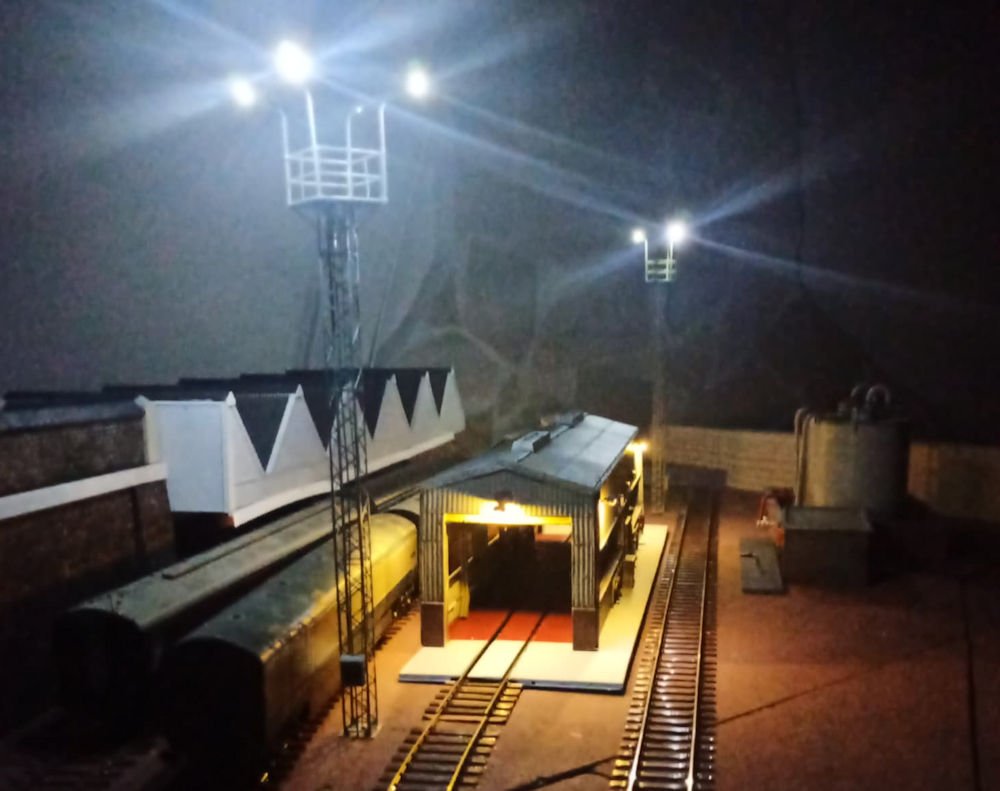 Miraculously the lights work despite my incompetence in the 'moving electrons' department. The bulkhead lights on the shed work too, but they are
grain of wheat bulbs and are far too bright, so need their own dedicated power supply. In the fullness of time there will be lighting under the station canopies.
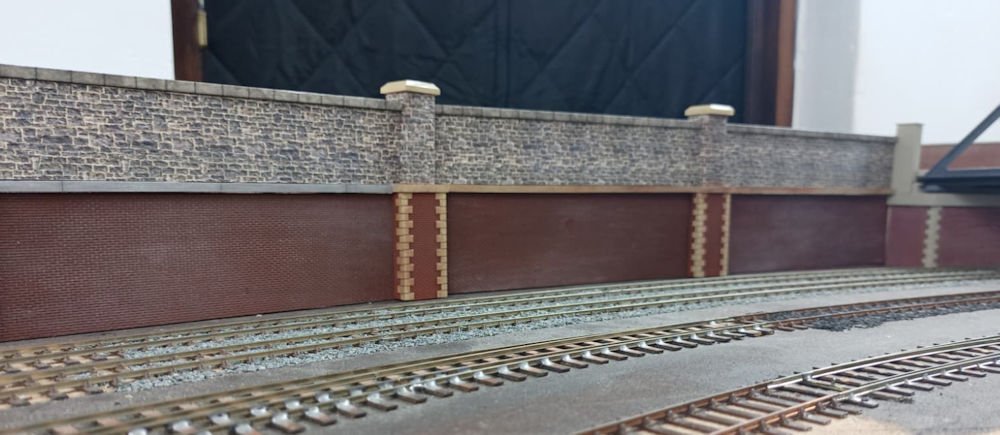 The retaining walls have had their first coat of basic weathering and are awaiting adjustments to make them flow more naturally.
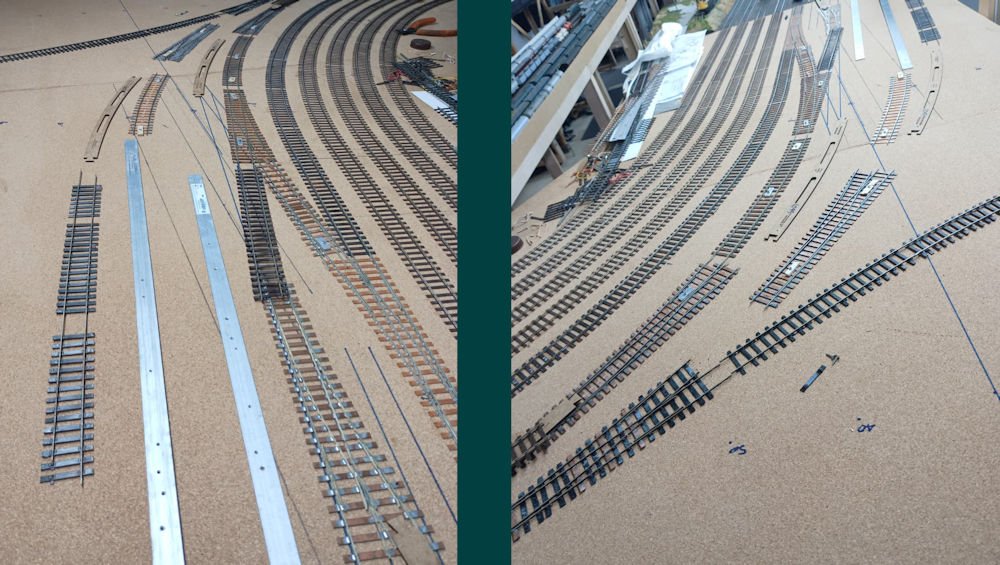 In full butterfly effect mode, I've also made a start on another goods yard, currently in the early planning stages as can be seen.
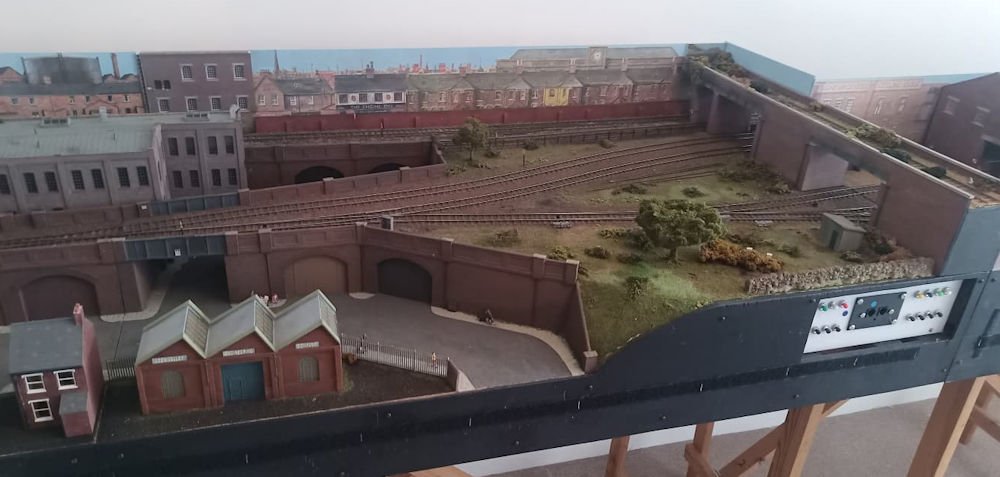 And now for something new to me and my son Stuart, which I will be helping him with during my visits to Blighty.
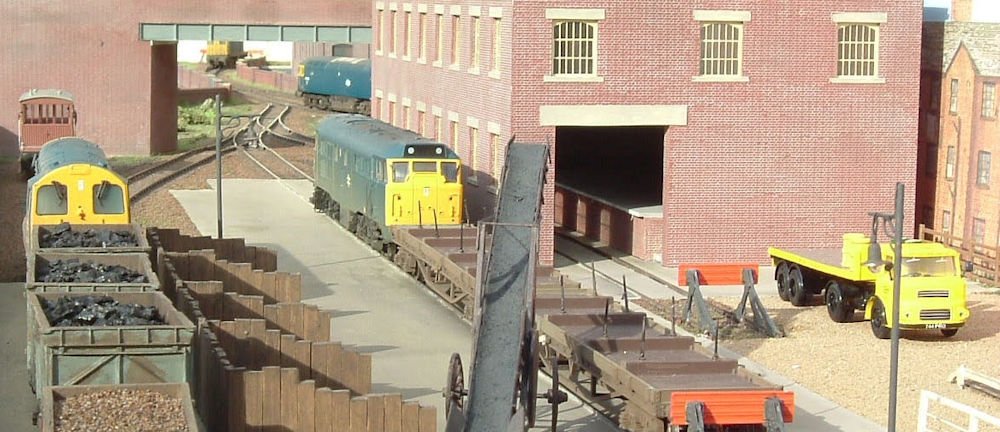 Basically it's an acquired EM layout saved from the tip and will be a long term work in progress.... sound familiar?
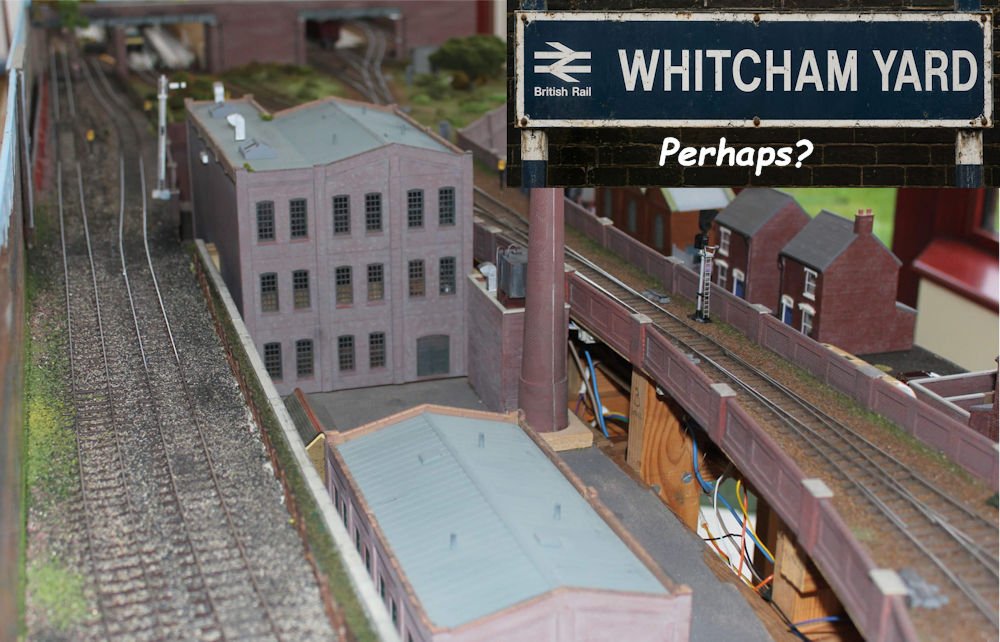 I think the pics will tell as much as is going on currently! It used to be called St George's Yard / George Street, but Stuart
is pondering over a new name for it. Watch this space for further updates.

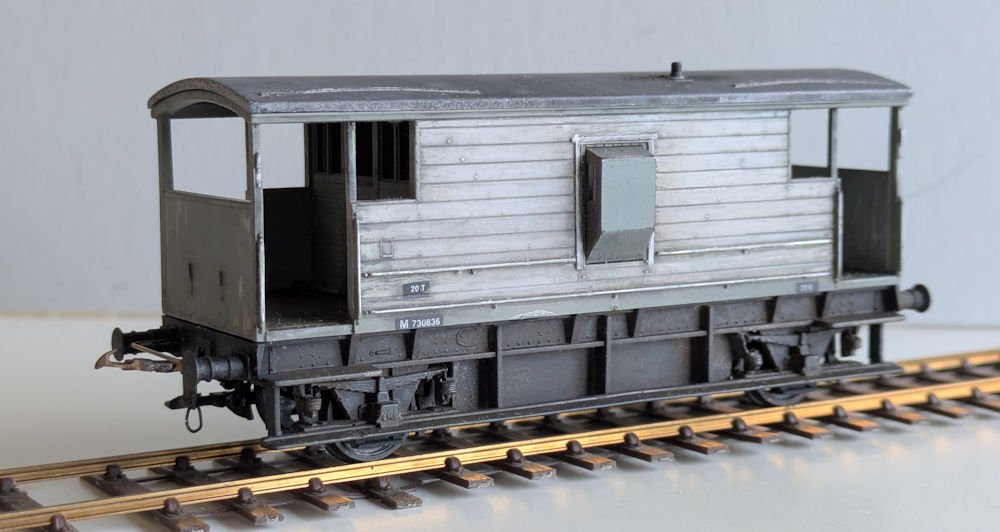 A converted Dapol LMS 20T Brake Van. Brakes and springs have been corrected as per an old BRM article and are now inline with wheels. The added
weight box from plasticard gives a substantial upgrade for little input.
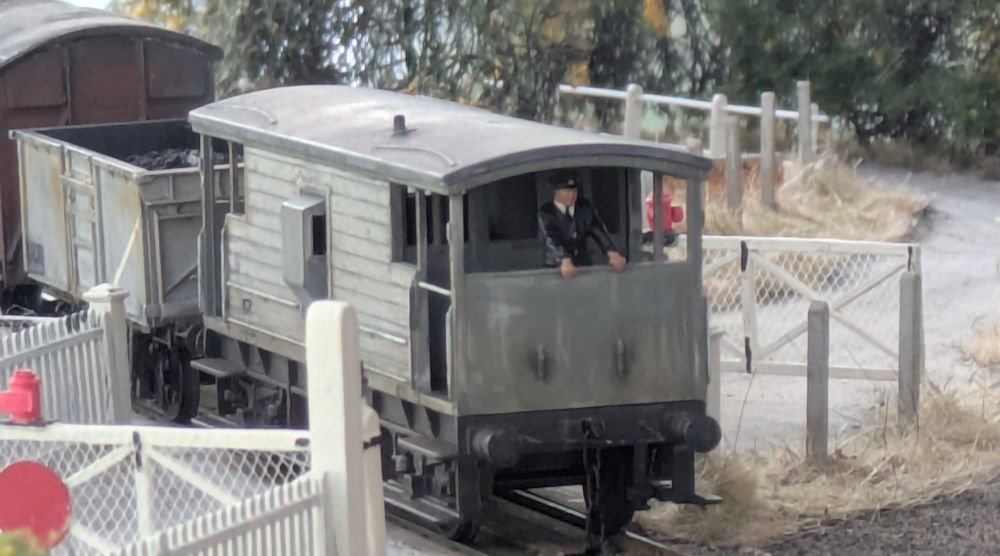 The morning Haverhill freight passes through Whitley. With a heavy coat against the cold, the guard looks back and ponders over the scene.
In 2 weeks, this will be the end of the line on the 31st December 1961.
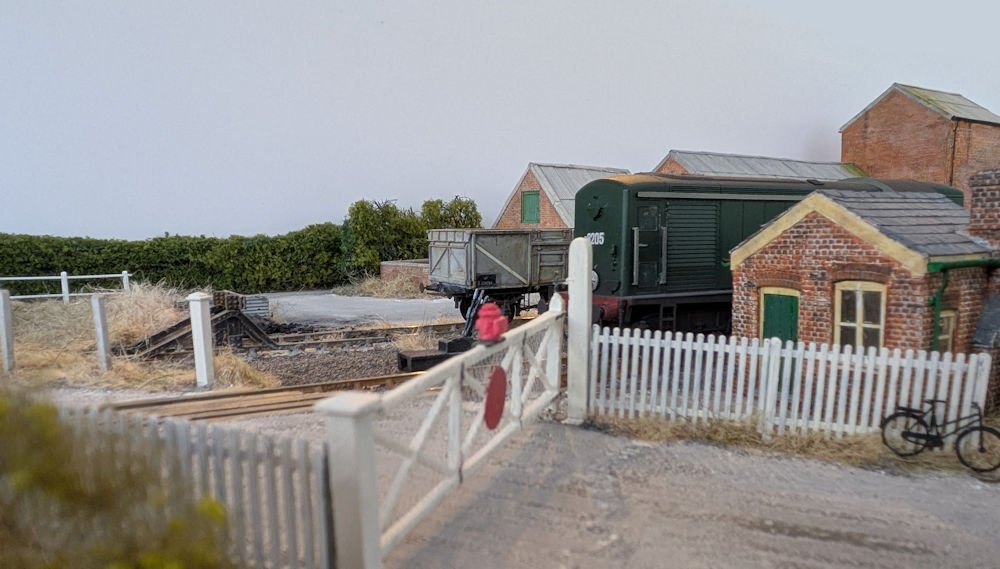 BTH type 1 D8205 stands by the crossing hut waiting for the point levers to be operated ready to move off and shunt the yard. The black
lever is for the turnout, and the blue lever for the locking bar. This is a new addition ready for the SHMRC at Portsmouth exhibition this
coming month and completes the layout suggestion of signalling equipment.

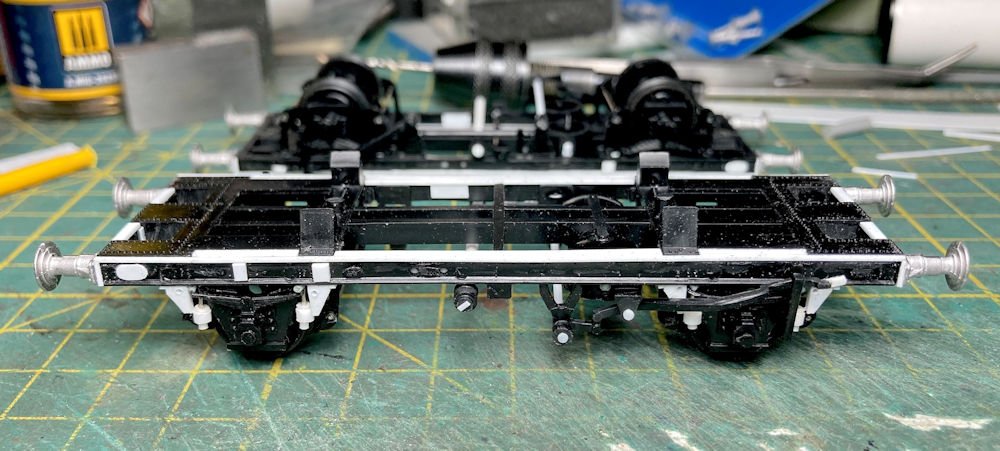 With very little modelling done during the summer heatwave, time was spent doing some research into the BR Soil Mechanics Section after the impulse
purchase of two old Airfix Esso tank wagon kits, which I’ve always been rather fond of. A future project will be one of that section’s Mk1 BSK
conversions but they also operated several unusual items of rolling stock. The fleet included several of the BR diagram 1/636 22-ton rail tanks
built by Charles Roberts, which were, of course, similar to the long-lived Airfix kit but built as creosote tanks. The project began with the
same modifications carried out on the similar rail tanks that were done a few years back to improve this old plastic kit. This involved removing
the top lip of the undersized solebar, the fitting of a new strip and a few other alterations as seen here. The first of the two used the
suspension as it came but this one was modified with auxiliary suspension using the original modified springs and new fabricated parts.
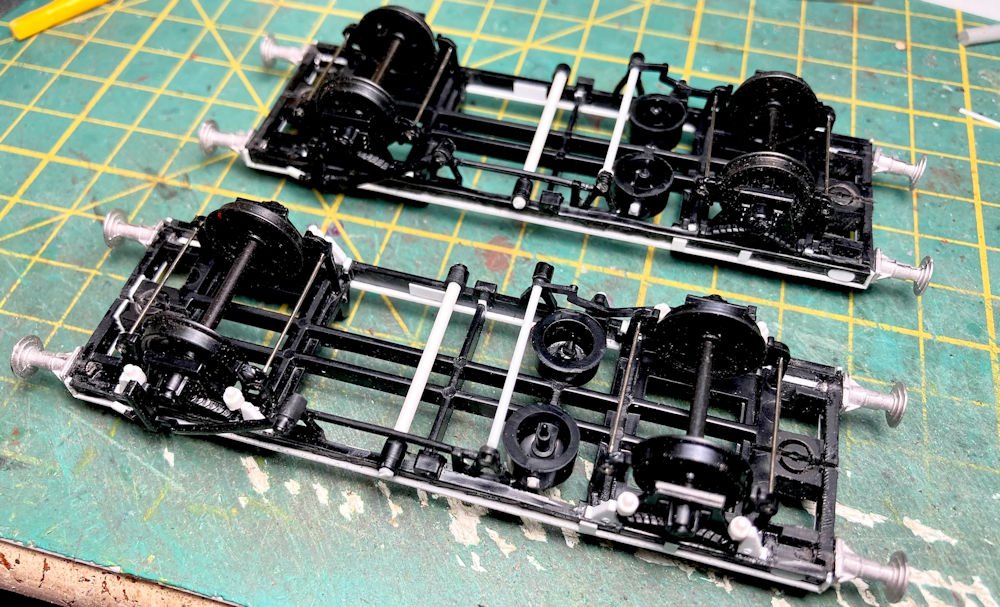 Looking underneath we can see the modifications from a different angle on both of the tankers. The nearest example, with the auxiliary suspension,
will be DB998995, initially allocated to the ScR for Greenhill Sleeper Depot and the other will be DB998992, when new allocated to the WR
Creosoting Works at Hayes. Both were later allocated to the Soil Mechanics Section. The tanks were used for formation preparation and ran
with wagons carrying blanketing material (such as fine stone dust or sand) on track relaying jobs. Once that was laid down a bitumen emulsion
mix from the tanks was sprayed over this as a binding agent and waterproofing layer, under the direction of the Soil Mechanics Section. This
technique was later replaced by heavy gauge polythene sheeting.
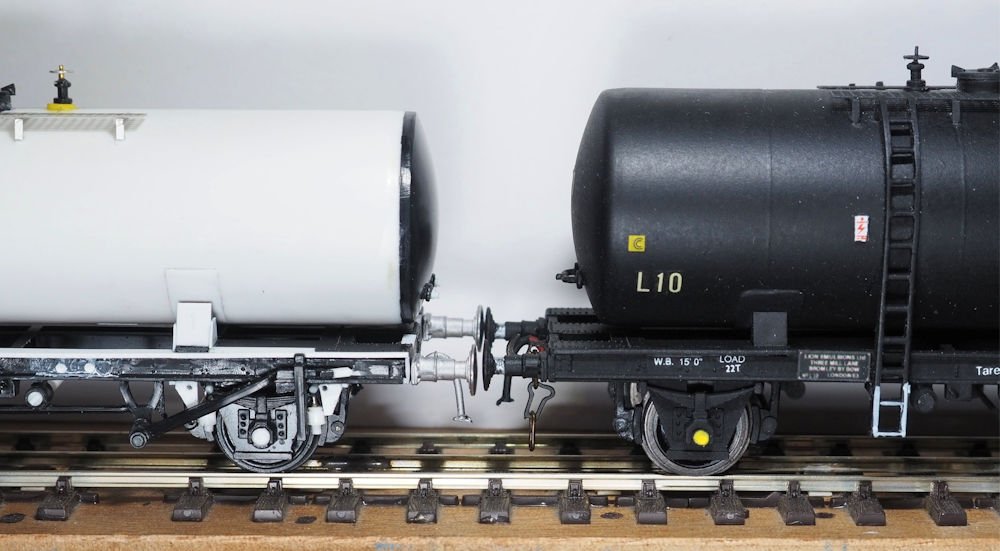 The creosote tanks featured a different barrel to the kit version. The prototype tanks were 24ft 8in in length and just under 6ft 7in in
diameter, around 26mm in 4mm scale. Finding tube of that diameter was not easy but after a long search Screwfix came up trumps with a 2m length
of 25mm UPVC conduit. After spending the grand total of £2.04 there was more than enough for the two tankers (and a lot more if needed!). With
the conduit cut to length an overlay of 20-thou styrene sheet, curved around a former using a pan of boiling water, was super-glued around them
to bring the diameter up to the correct 26mm. The kit manhole was used, cut from the original tank moulding then fitted into a suitable hole
drilled in the top of the new barrel. The original ends were clipped on and glued then, once fully dry, were filed down to the new diameter.
The difference to the original kit can be seen to the right where it is buffered up to the Lion Emulsions tank completed a few years back.
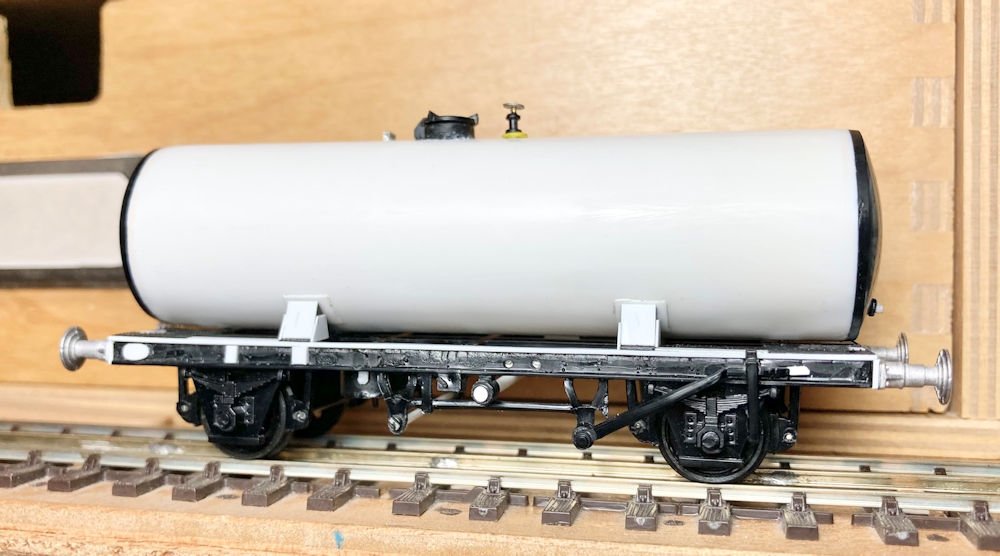 Here is the almost completed DB998992 before fitting the single ladder and the prominent number boards to the left side of the chassis. Transfers
for the original allocations of these tanks are available from the excellent Cambridge Custom Transfers range but the later Soil Mechanics
markings needed to be custom made for my two tanks.
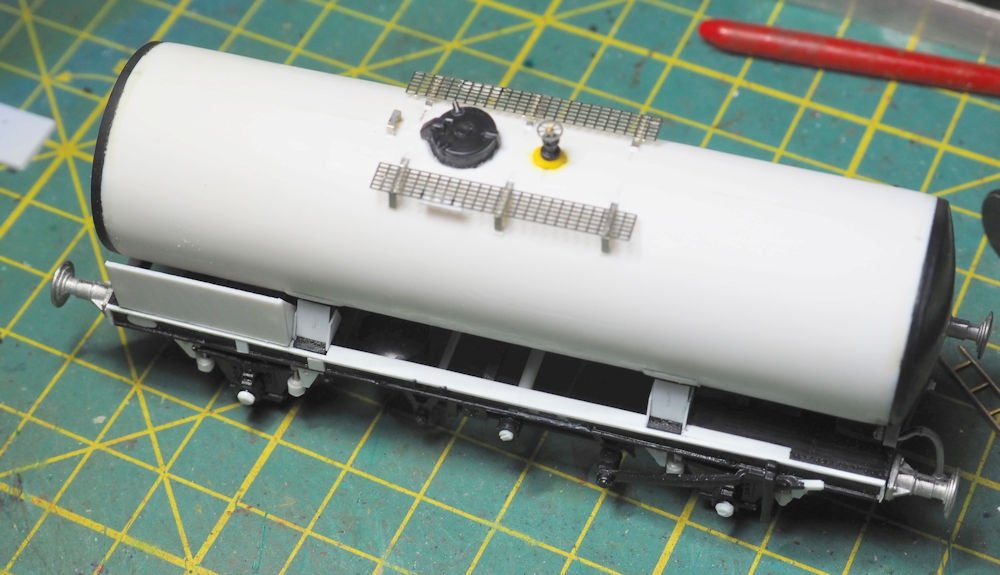 As with the Lion Emulsions tanks the excellent RT Models upgrade etch was used on these two. The ex-WR tanks was one of those with no walkway
and a ladder, rather unusually, on one side only but the ex-Scottish tank had the same fittings as the Airfix kit so the RT Models version was
fitted, as seen here. For ladders the original kit examples, much thinned down, were used for this version but a new one was fabricated using
some old etched ladder parts for the other tank as it was a far more angular shape than the kit parts. The number boards are now fitted.
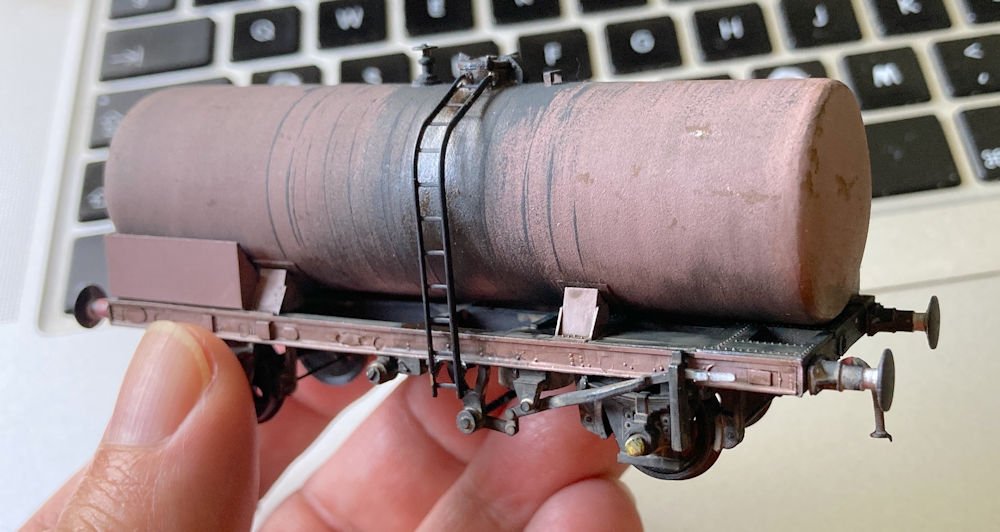 These tankers led a messy life and were rarely seen in anything remotely approaching a clean state and I was keen to capture the distinctive
weathering. The barrels and ladders were not permanently attached to the chassis’ until after painting to assist with the weathering process.
Here we see the first of the pair, which has been finished in the weird purple shade into which certain batches of olive green rapidly weathered.
It is fitted with a ladder on only this side, with a distinctive curve, and no walkway. Once dry the tank was painted with various shades of
black and then a single strand from a length of layout wire was coated in paint and laid across the tank to form the distinctive dribbles seen
on the prototype. The shiny residue was created with a military modelling ‘engine oil’ weathering enamel.
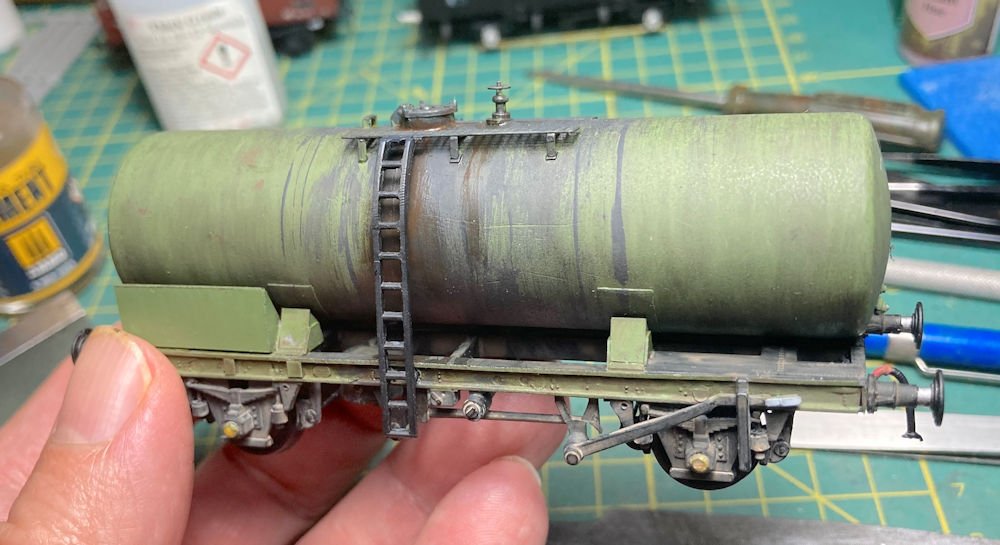 The second of the two was painted in a faded olive green which some of the BR paint batches ended up carrying after a few years. This one has
the thinned down Airfix ladders along with the RT Models walkway upgrade and, of course, auxiliary suspension.
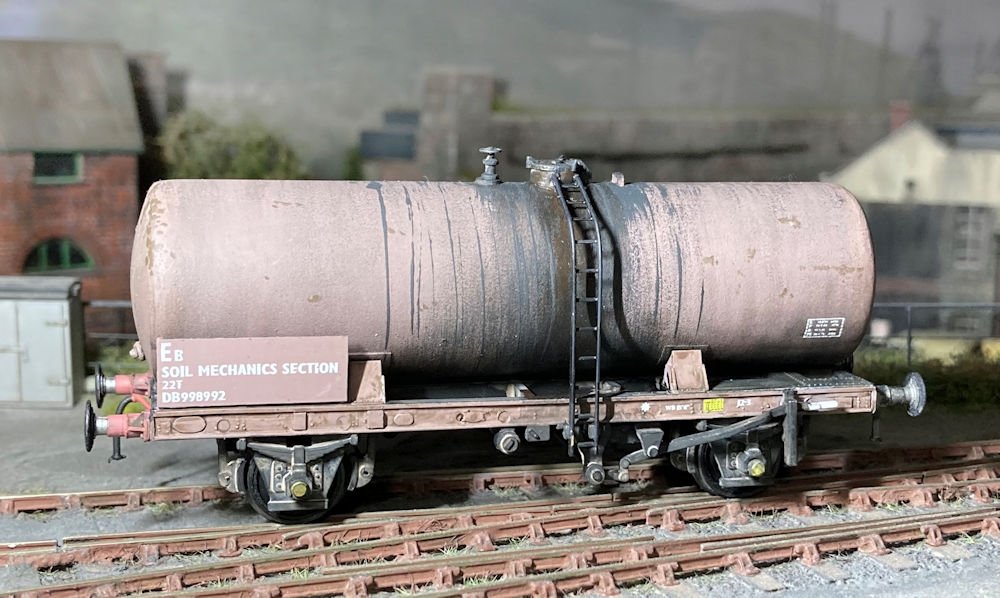 A brief burst of sun on a dark winter’s day and we see DB998992, now with transfers applied…but no couplings having discovered that I had run
out of them! Note the slightly different strengthening plates at the tank mounting points compared to the other tank. It was surprising how
many differences were to be found in the BR 1/636 fleet. It is certainly worth working from a prototype photo if modelling these wagons.
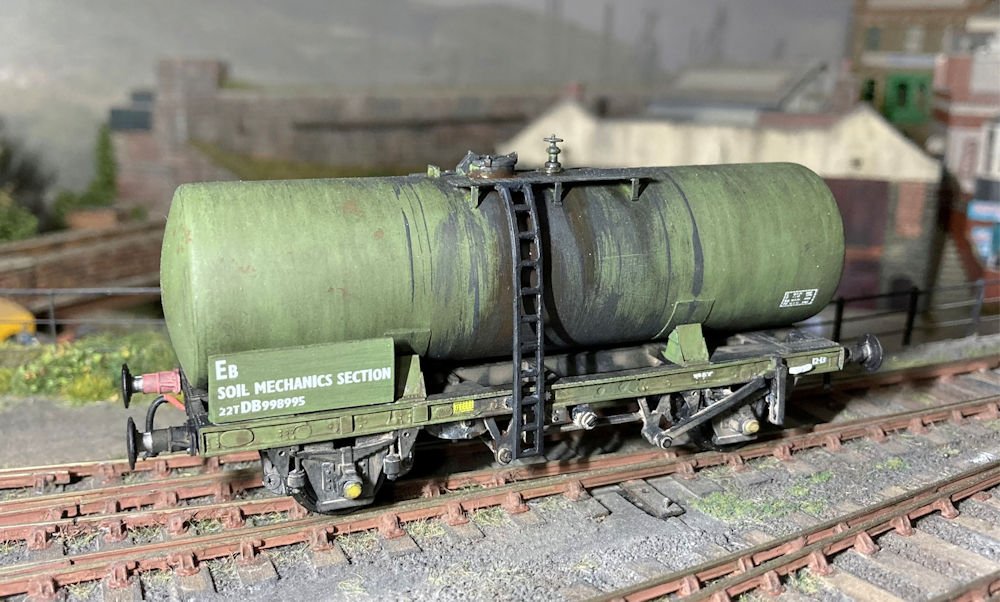 And here we see DB998995, still in that sunny patch, and keen to get to work on the next formation preparation job (once it gets some couplings).
One of the locations they loaded bitumen emulsion was the Lion Emulsions facility in Hereford, where they could be seen alongside the Lion
fleet, which, of course, are already in the Morfa Bank fleet.
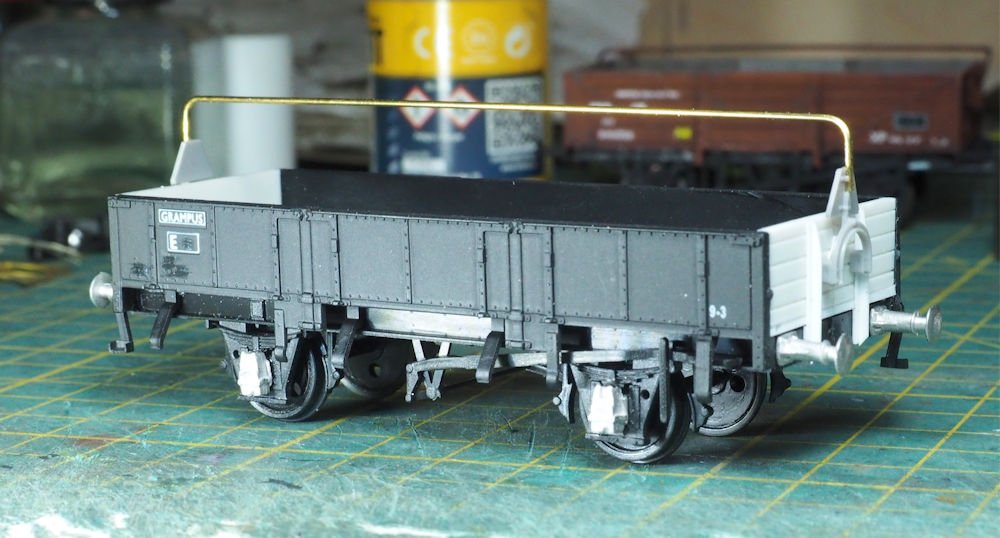 The Soil Mechanics Section studied the mechanical and physical properties of the soil, their behaviour under load and the analysis of the
causes of any movement which may occur in the subsoils, specifically for rail infrastructure. The Western Region CCE Office was one of the
first to operate a Soil Mechanics Laboratory, in later years based at Porchester Road near Paddington. By 1968 the function had been
incorporated into the RTC at Derby. For their varied work they also operated other wagons and the next one for my fleet was used to carry
components of earth boring equipment used for their analysis work. The basis for this was a Dapol vacuum-braked Grampus, a nice model even
without the conversion work and very easy to convert to EM gauge too. It was an unusual wagon in that it was built as unfitted and then
given clasp brakes for its new role but keeping the original oil axleboxes. It also gained new planked ends and a tarpaulin bar. All the
modifications can be seen in this view except for the tie-bar, still to be added (and another retention from its unfitted days).
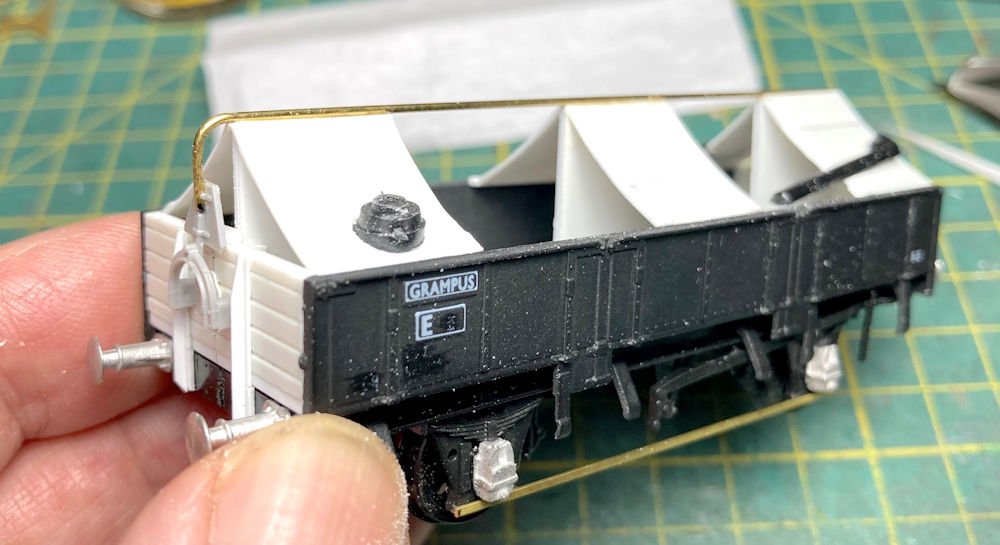 This rather poor view shows the method of supporting the tarpaulin using curved styrene pieces with some scrap plastic added to give the
impression of a load beneath the sheet. The tarpaulin was made from a sheet of carefully crumpled paper and was still to be added, once the
supports had fully dried. It was kept in place using a diluted mix of PVA glue, painted on.
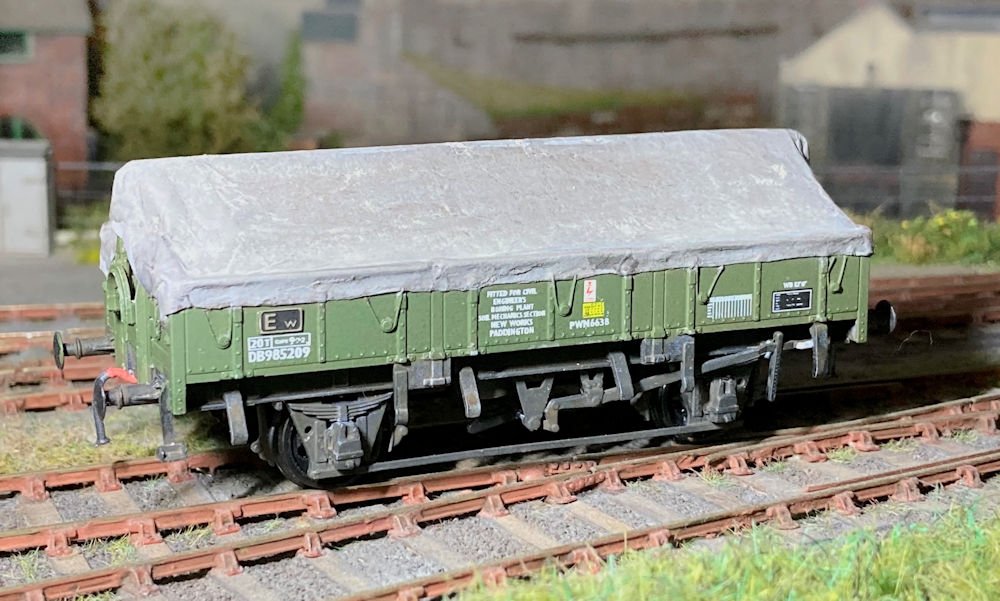 Finally here is that modified Grampus with the unusual sheet support bar and some new paint. Some further detail painting, weathering, and
couplings, still to come. I rather like the branding ‘Fitted for Civil Engineers Boring Plant’! The number PWM6638 referred to a set of
Pilcon earth boring tackle, powered by a small Petter diesel engine and used for taking soil samples for analysis. Other Soil Mechanics
stock still to be added will be the aforementioned Mk1 BSK, at least one ex-GWR AA3 Toad brake van conversion, possibly a later AA23 Toad
that worked with the bitumen tanks and one of at least three SR parcels vans.

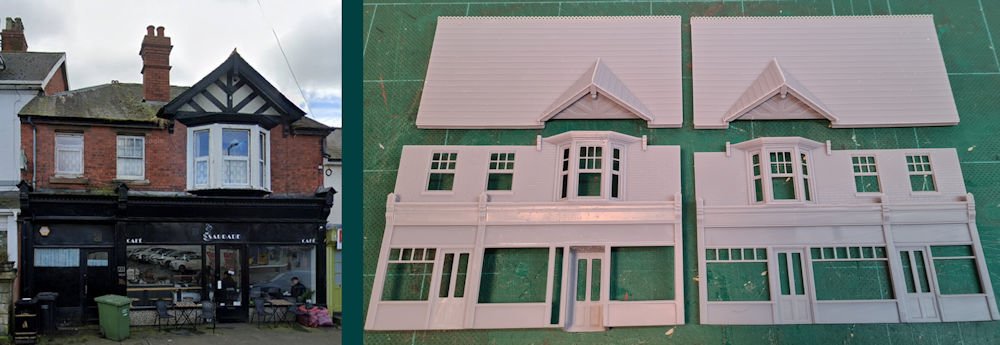 Using a row of shops in Hereford as inspiration, Jonny Duffett has drawn up and 3D printed a couple of facades, one of them a mirror image
with modified frontage. These designs will be used on his own OO gauge layout, and he's kindly printed a pair for me to use on Ferry Road.
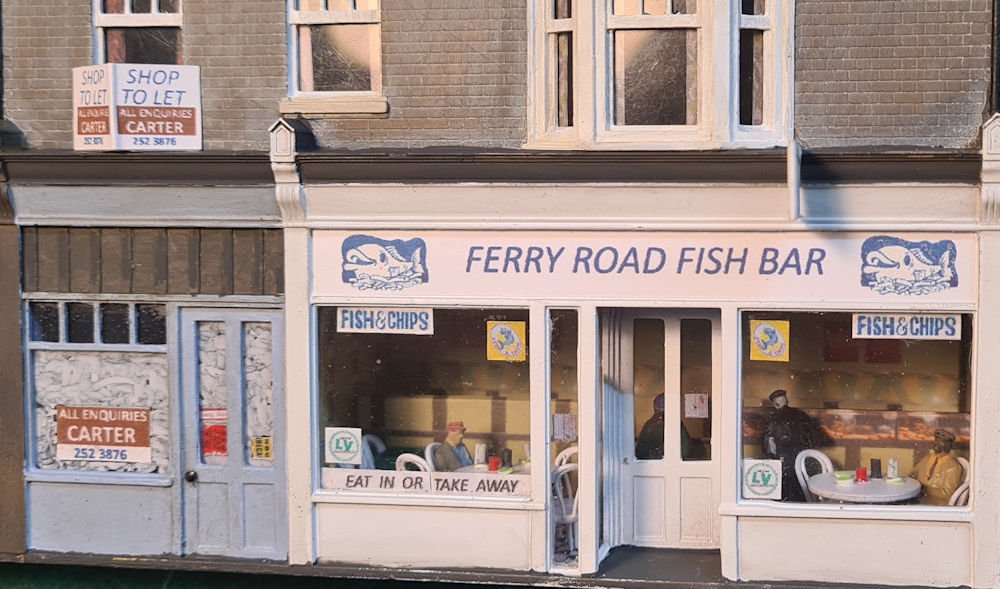 With the large windowed shop I decided to detail the interior as a fish bar, again using some of Jonny's 3D printed chairs and tables. A
tiered print-out for the rest of the fish bar completes the scene.... salt and vinegar anyone?
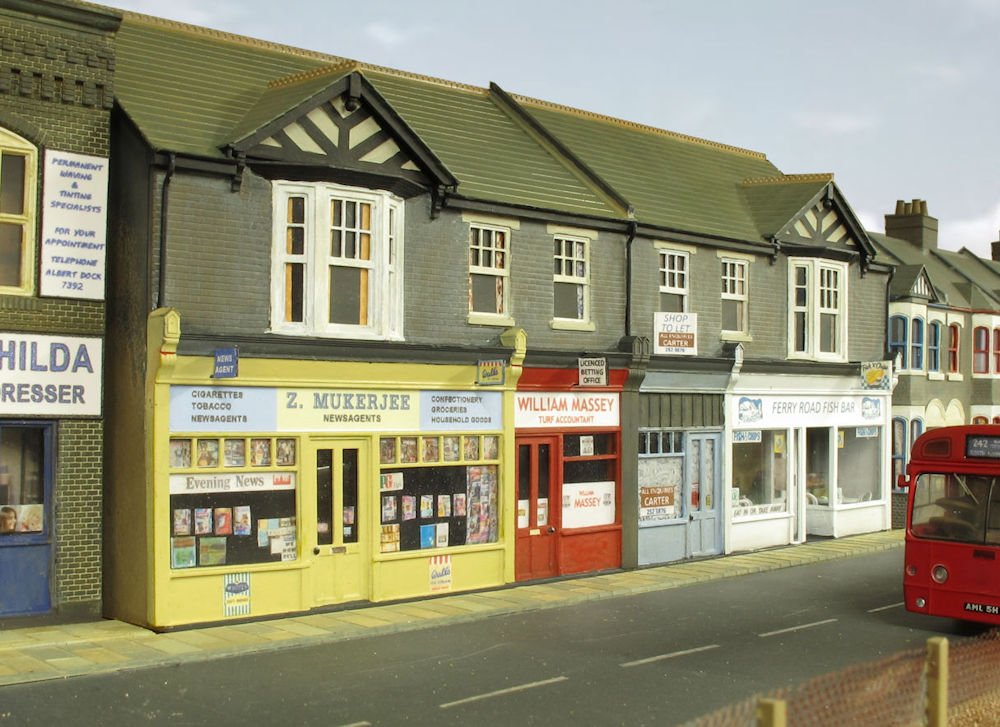 The other large windowed shop is a newsagent featuring a lot of clutter in the window comprised of publications and posters,
so I felt there was no need to detail the interior, as it would be difficult to see anyway. The same goes for the adjoining bookmakers, with
the windows panelled over. Z Mukerjee's newsagent was inspired by an episode of 'Minder' titled The Bengal Tiger, whilst William Massey was
an independant chain of over 20 betting shops located in various parts of East London.
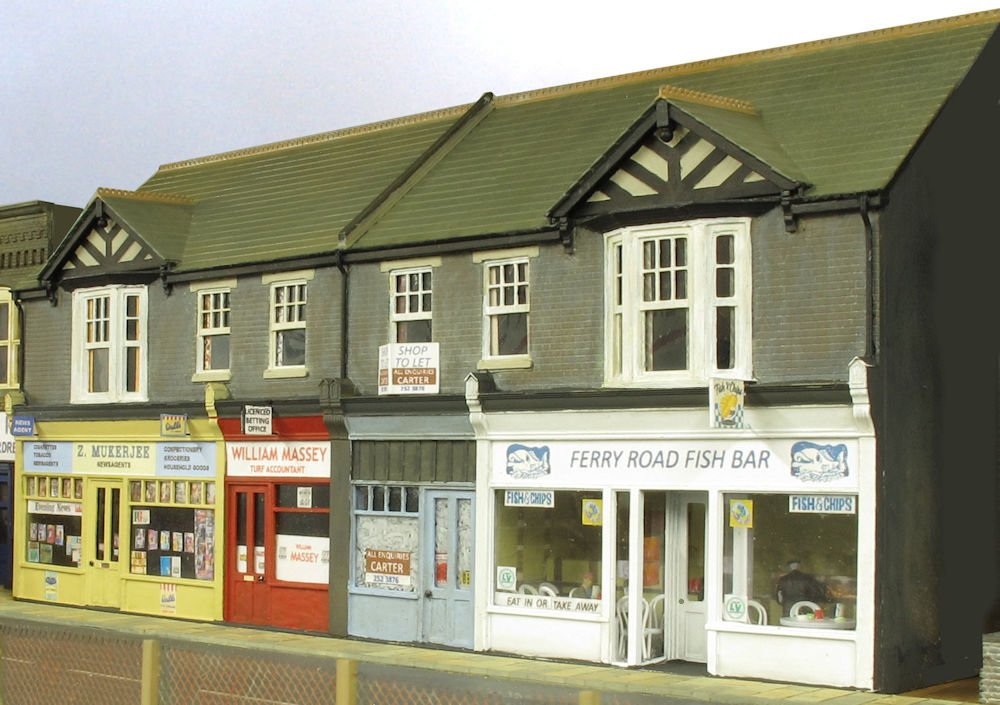 With no decision made on the next shop in the row, I decided to leave it blank awaiting a new occupier. The windows have been fogged out
as commonly seen on premises undergoing refurbishment, so maybe it won't be long before someone takes it over. The Ferry Road Fish Bar came about
as one of the pre-requisite businesses for the planned long row of shops, with ideas for others in the pipeline to include a typical East End pub.
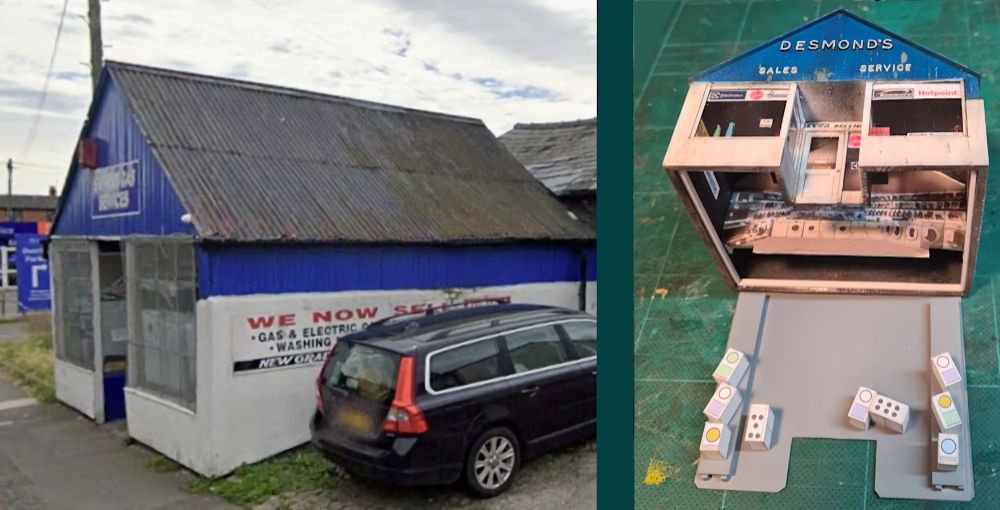 And now on to another of Jonny's 3D prints - an all-in-one printed building which is also located in Hereford just along the road from the shop
featured above. With its large windows, the interior was crying out for some detail, and as it's presently used as a domestic appliance retail
outlet, I didn't have to think too hard about its use on Ferry Road.
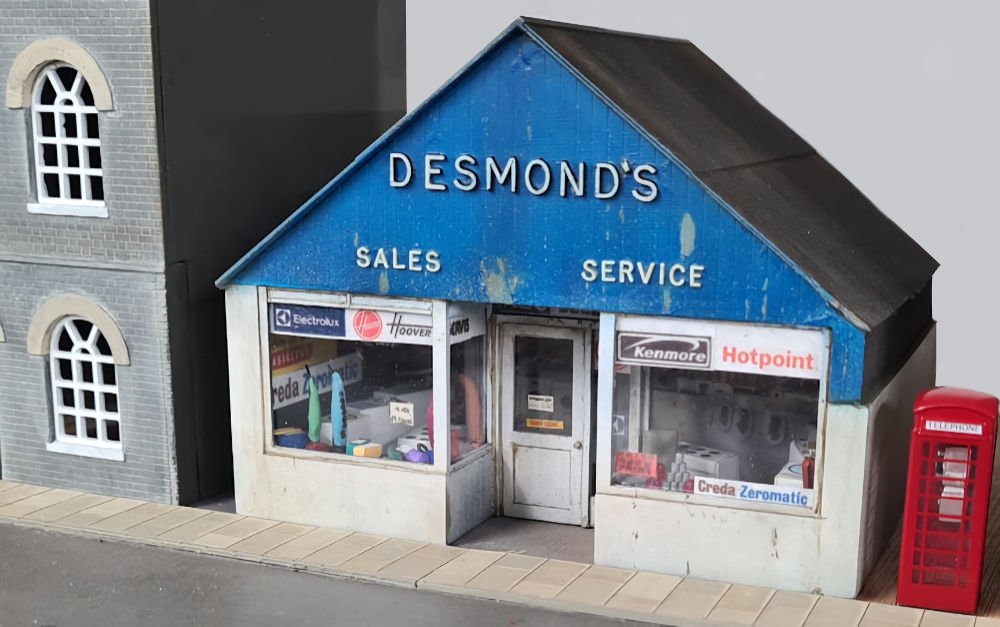 Twin-tubs were the order of the day back in 1970, so these have been made from chunks of styrene strip, wrapped with printed paper covers
and fitted to the interior floor space, along with some upright vacuum cleaners, cookers and the new fangled front loader washing machines beyond!
The designs featured in this update are available for free download at Jonny's Iron Mink page on
Thingiverse.
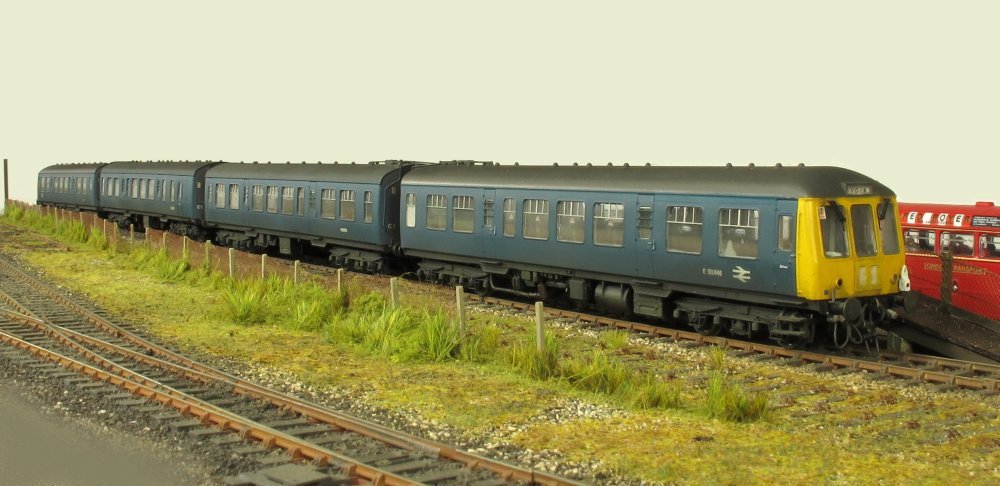 A North Eastern allocated Class 108 4-car DMU has just arrived at Ferry Road station, and the oil tail lamp will need to be put on the other
end of the unit before it heads back. This 4-car set was put together and customised by Paul James as part of his Eastwell fleet and was a
regular visitor on Wibdenshaw during its exhibition years. It has now been transferred to Ian Manderson's Easington Lane fleet - hopefully
for use on his new layout project (hint hint - no time like the present) based in the Newcastle area. This scene could no doubt be
enhanced by the addition of some background buildings.
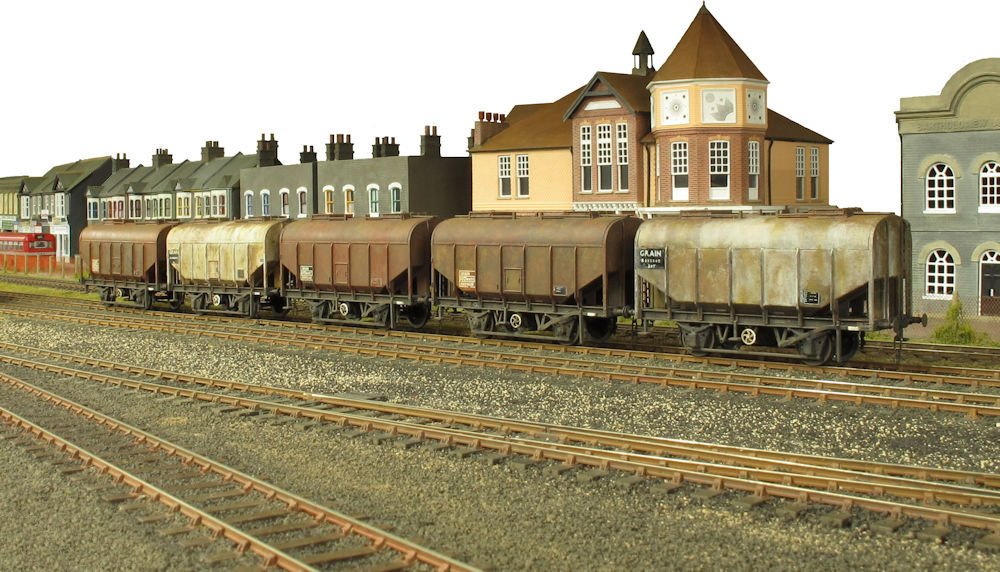 With a few of the recently constructed buildings for Ferry Road in the background, a raft of Grain wagons sit in the reception road awaiting
onward movement to the docks. These 5 Bachmann wagons are new into the Hornsey fleet, having just received new numbering and weathering to
represent the rust buckets that they were.
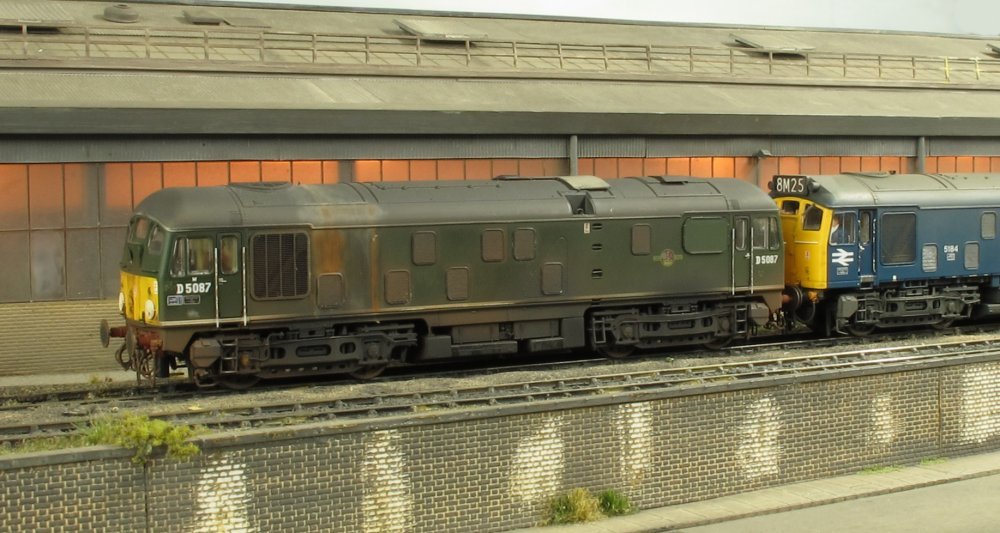 Captured at Hornsey Road depot is BR Derby type 2 D5087 - a SLW model from the Eastwell fleet.
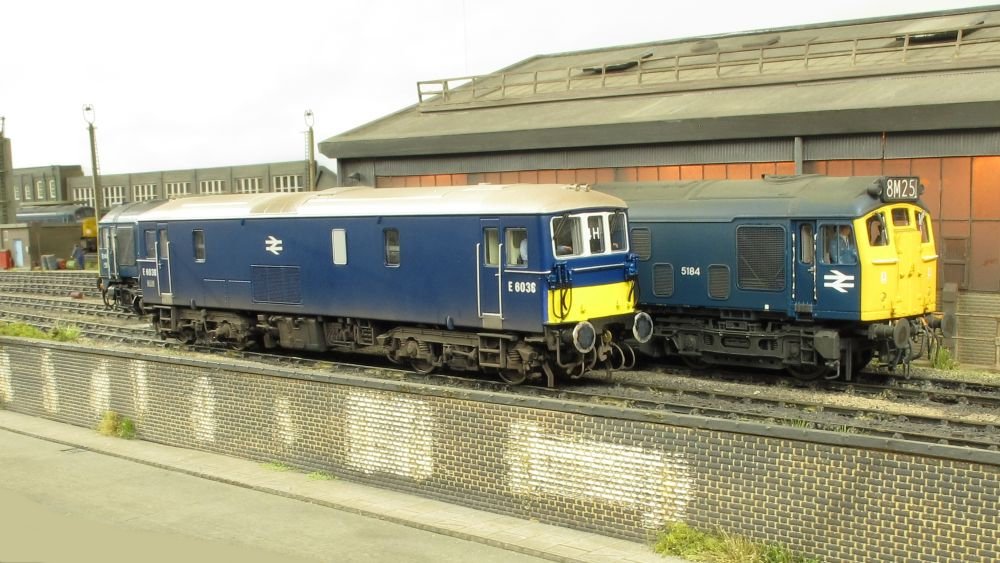 From Greg's Shenston Road fleet we see E6036 resting between duties. A Dapol model with a Legobiffoman sound decoder fitted.
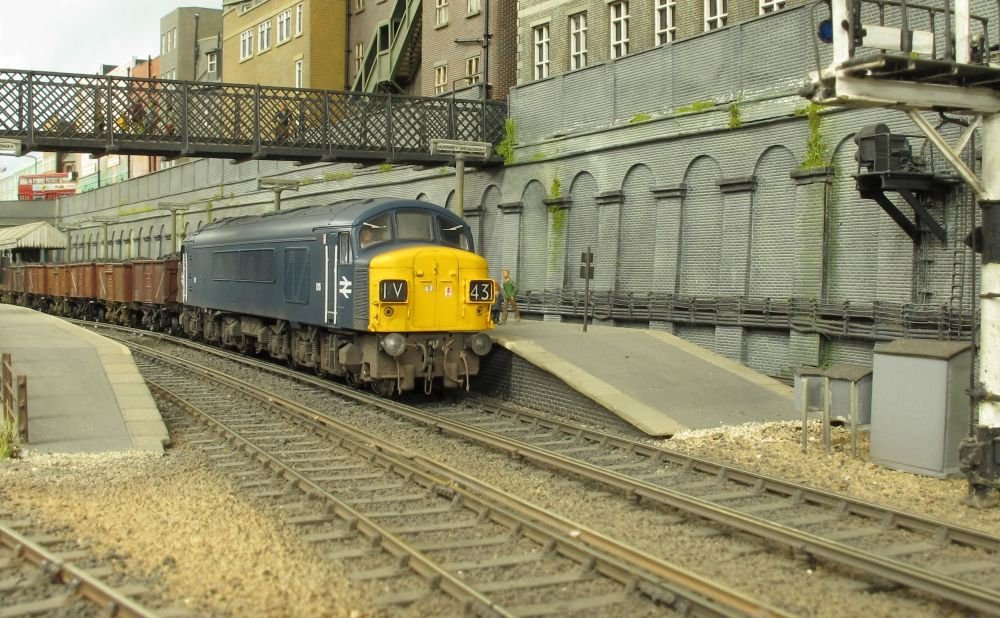 Finally for this month, Greg's Heljan Peak D15 is seen at Hornsey Broadway station with a block coal train heading for East London.